

Introduction
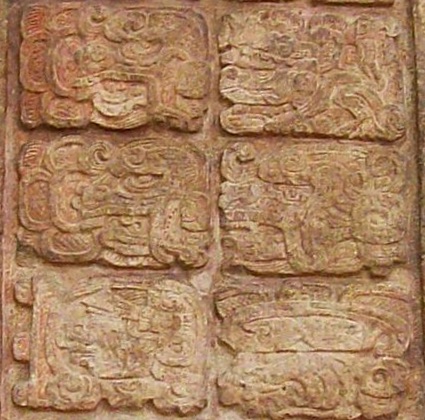
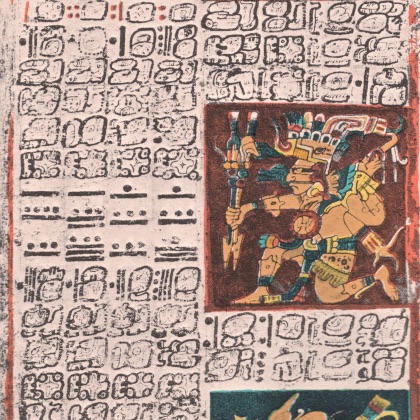
The Maya civilization used two different representations for numbers. One of them used very elaborate and ornate depictions of deity heads to represent digits, and has been found in stone engravings, mural paintings and manuscripts.
The second numeral representation was the one commonly used in the day-to-day activities and consisted only of dots and lines, plus a special representation for the digit zero. This is the system that we are going to explore in this activity.
The Maya number system used twenty digits. That is, instead of the ten digits that we use (0 to 9), they had twenty symbols that represented the quantities of zero to twenty.
Let us take a look at these digits:

The first digit at the top left of the grid represents zero. To its right, we find increasing digits from one to four. After four, we use a horizontal line to represent one group of five, and then keep adding dots to it to represent six, seven, eight and nine.
Two horizontal lines mean two groups of five, that is, ten. Similarly, three horizontal lines represent fifteen. After that, we keep adding dots until we have three lines and four dots, which add up to nineteen, the largest digit.
Materials needed
For this activity you just need a micro:bit, although having two micro:bits would allow you to count over 20.
Procedure
We will write a MicroBlocks program that uses the micro:bit 5x5 LED display to represent Maya digits. The top row of the display is going to represent the dots, while the lower three rows are going to represent the lines.

Drawing Zero
The natural thing to do would be to create a new block named draw Maya digit that takes in a decimal number under 20 and outputs its Maya representation on the 5x5 LED display.
To do so, select the My Blocks category and click on the Add a command block button. Name your block draw Maya digit and click on OK. This will add a definition block into your scripting area:

Since this block needs to take an input, we will click on the little right-pointing arrow next to its name to add what we call a parameter. By default, the new parameter is going to be called foo, but we can click on its name to rename it to whatever we want. In this case, we could call it digit value, for example:

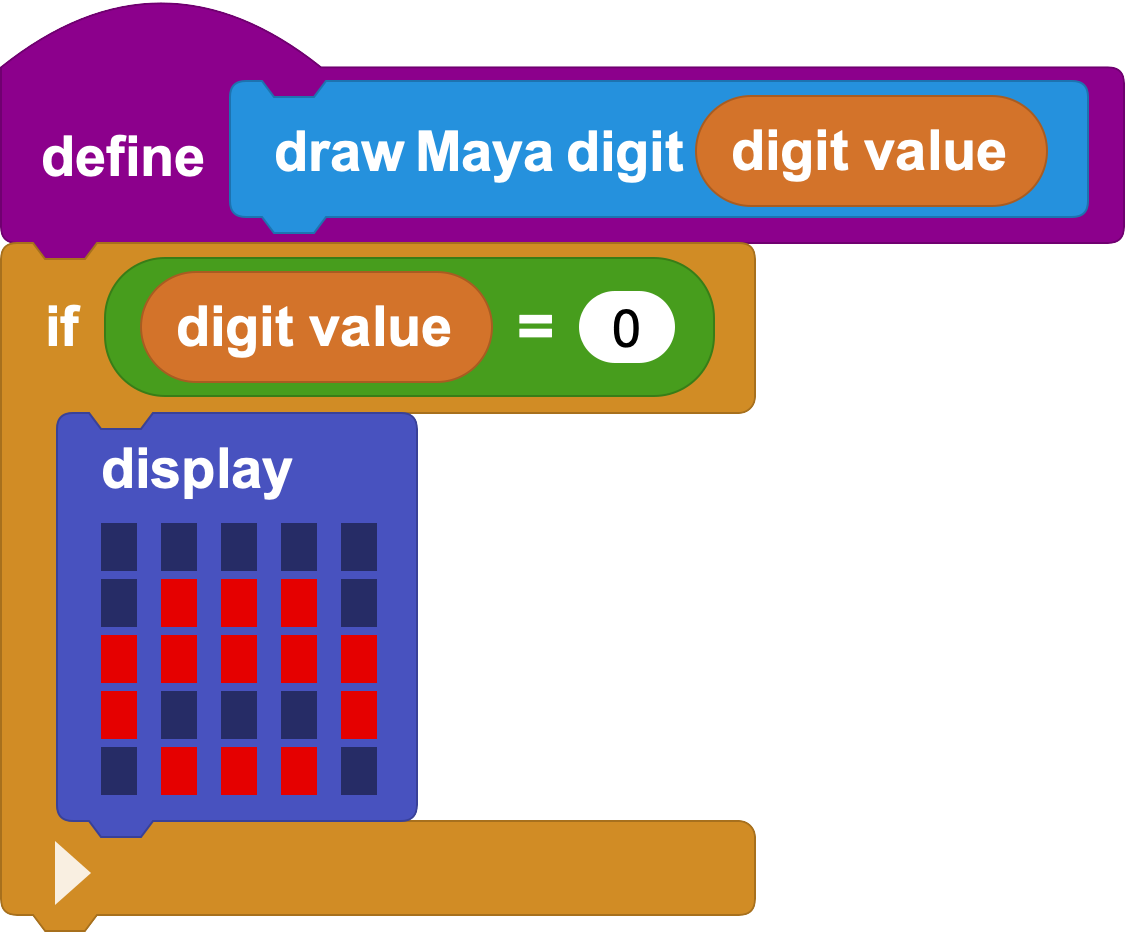
By looking at the grid of Maya digits, we notice that zero ( ) looks very different from any other digits. While the others follow a pattern of increasingly added lines and dots, zero is definitely a special case, so the first thing that our new block will do is check whether the provided digit equals zero and, if so, draw it.
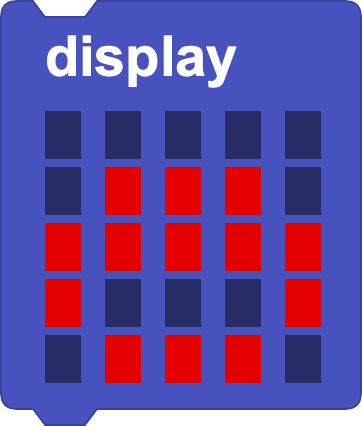
We could represent the zero digit by approximating it like this in the micro:bit display:
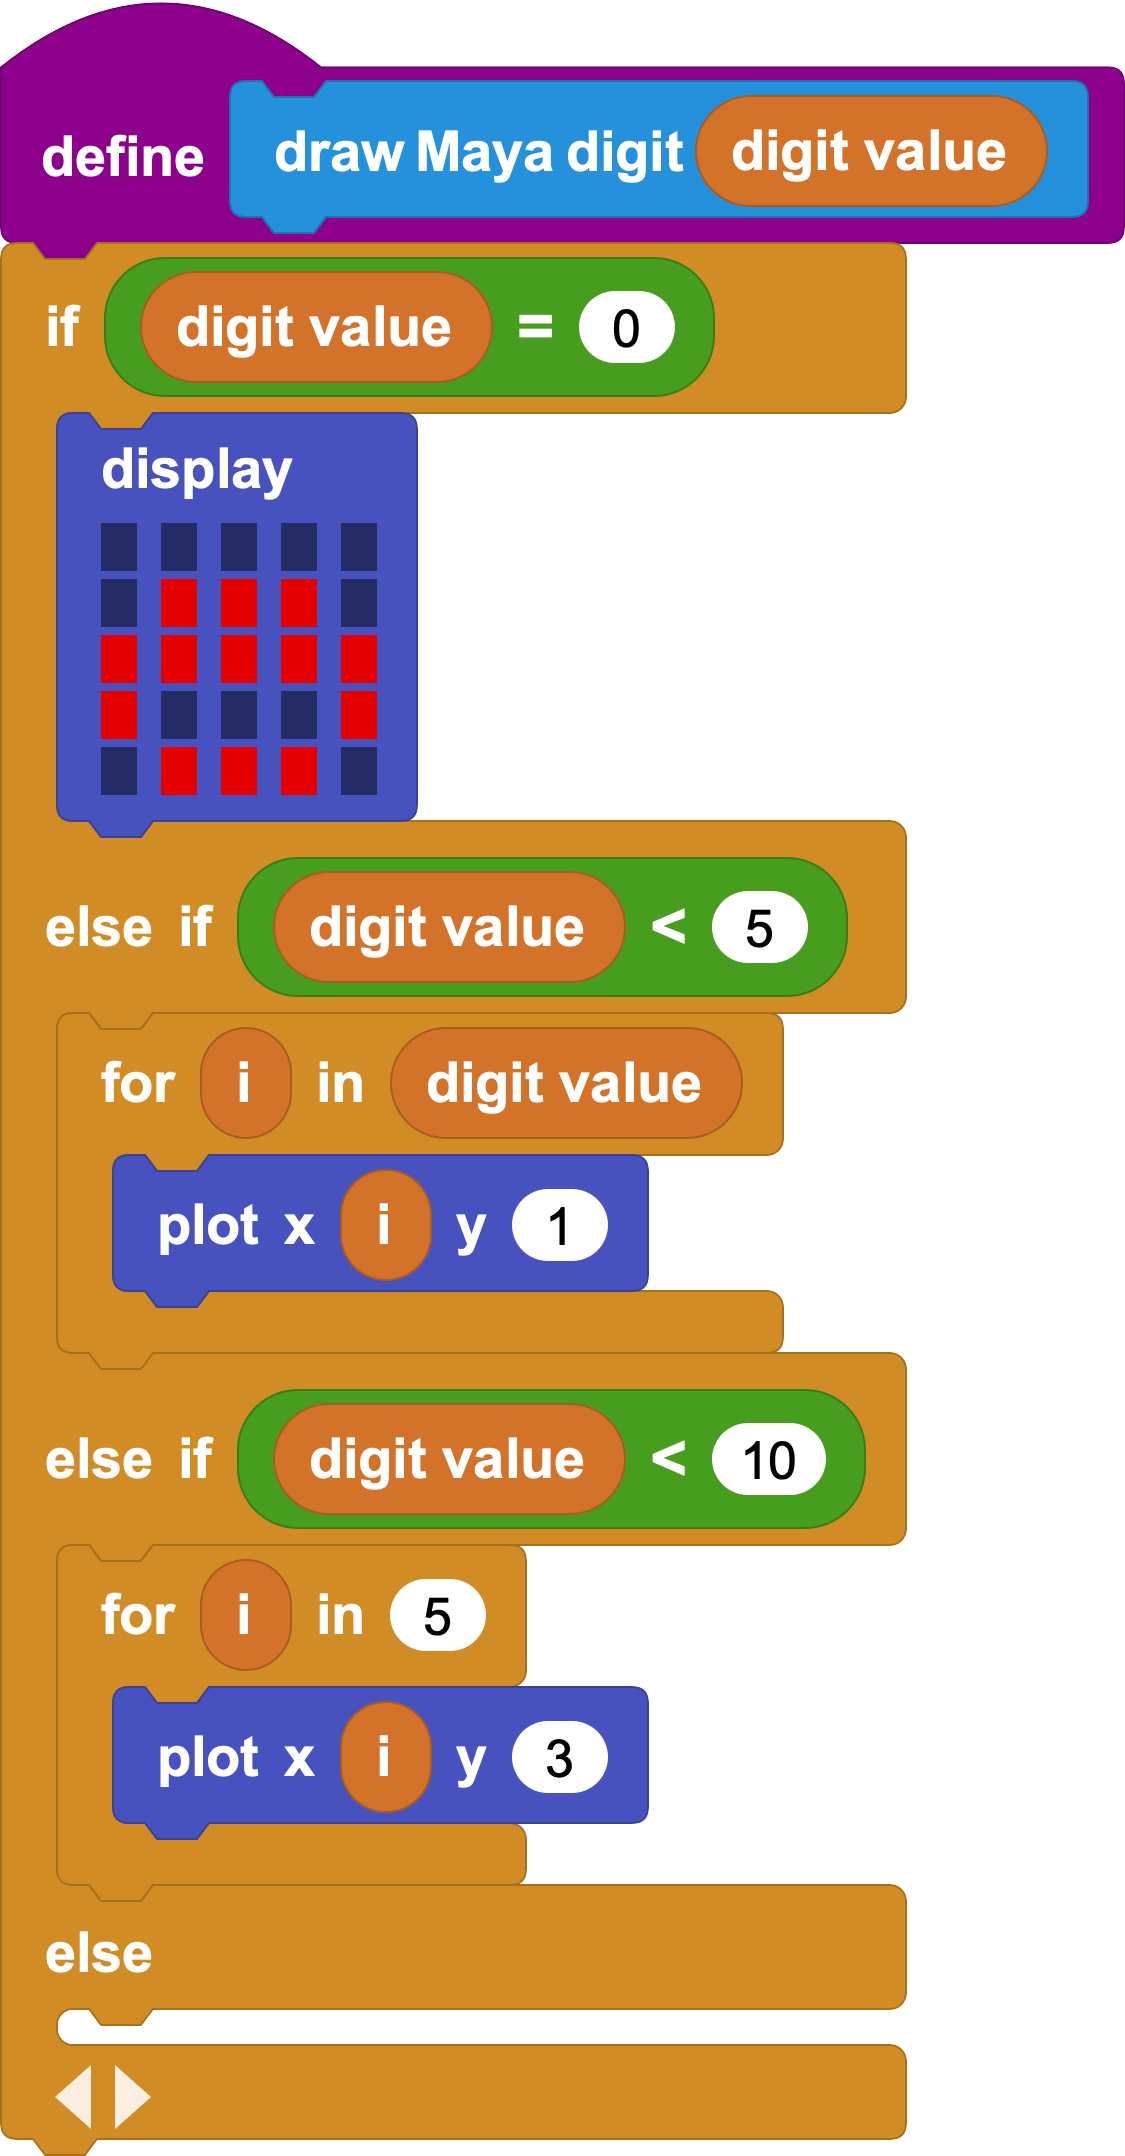
So, our first iteration of this block will look like this:
We can now test our new block with the digit value 0:

Click on the new block to test it and see the result on your micro:bit.
Between One and Five
Digit values between one and five are represented in Maya numerals as dots. We will use the top row of the micro:bit display to represent these.
To automate this process, we can use the plot block, that takes two different inputs: x and y:

The amount of dots we will have to draw will be the exact value of the digit, when its value is under five. A trick we can use is to iterate over the digit value, and draw a dot into each x position until we reach the digit value, all that while keeping y position fixed to the top row.
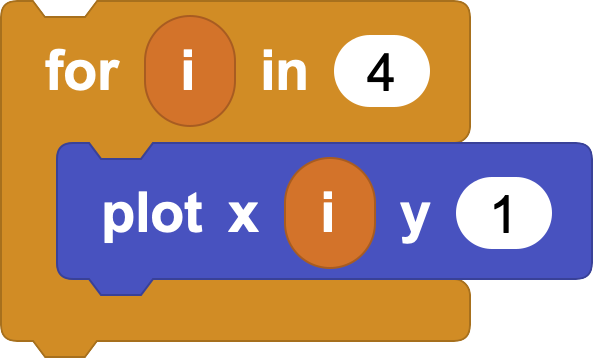
For example, if the digit value is 4, we will want to run the following operations:


We can automate the process by using a for loop, as follows:
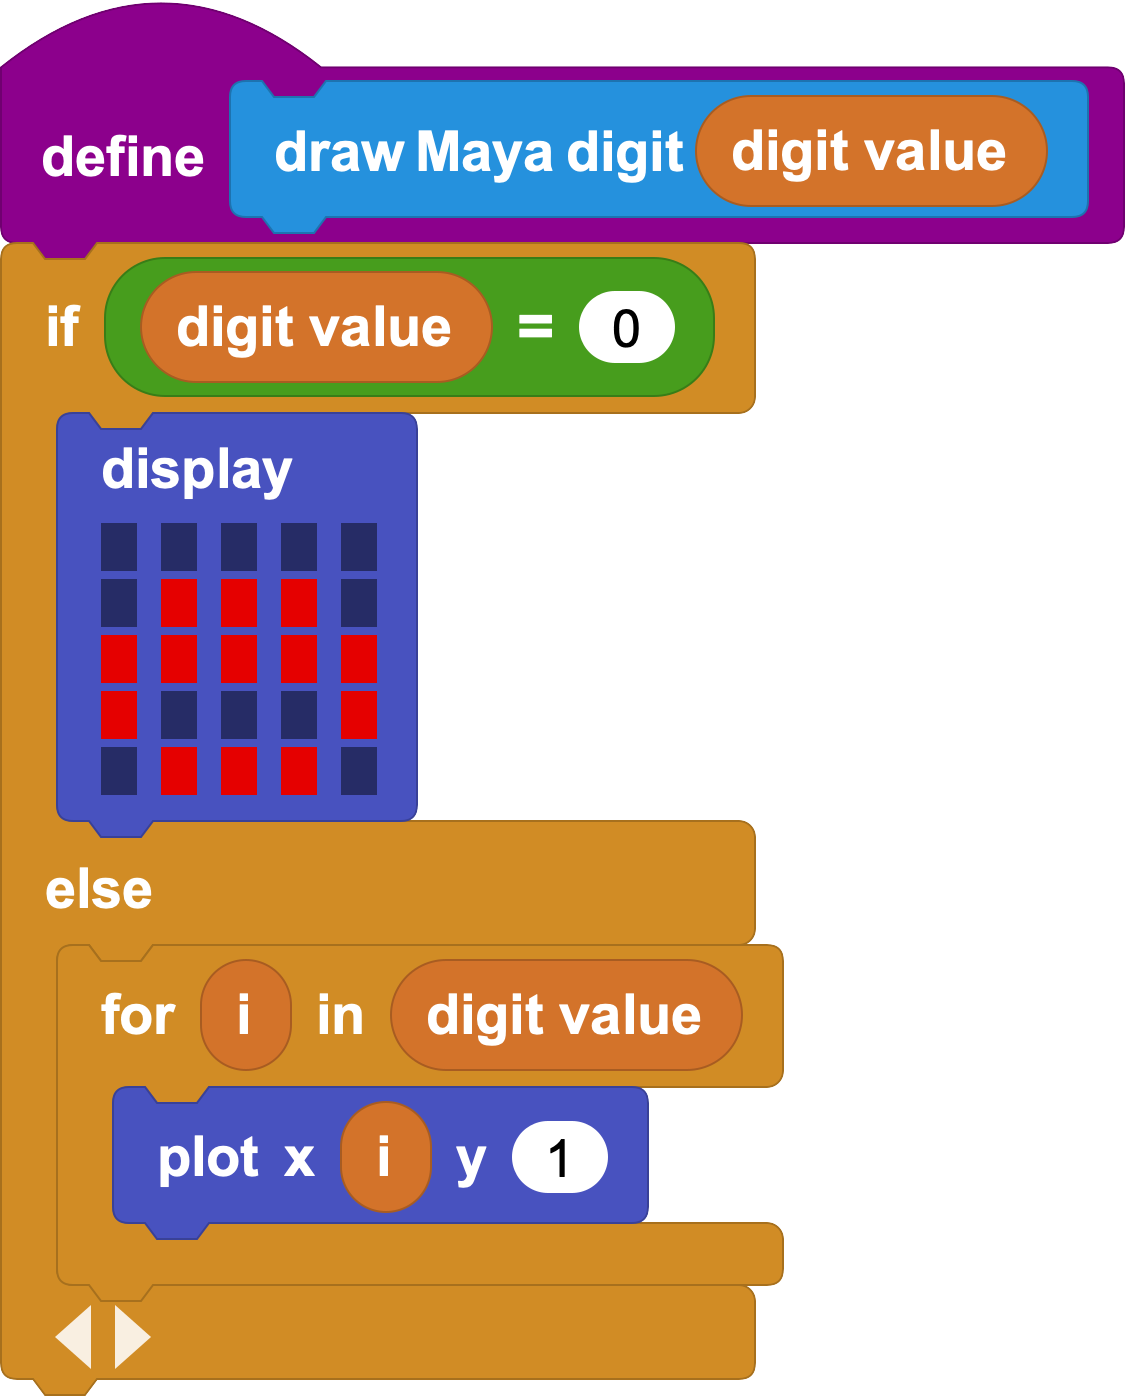
Now, 4 was just an example, but the amount of iterations will need to depend on the digit value passed to the draw Maya digit block. We thus need a new case in our block that checks whether the digit is lower than five, and draws dots accordingly. Click twice on the right-pointing arrow at the bottom of the if block to add two additional cases, and extend the definition of the block as follows:
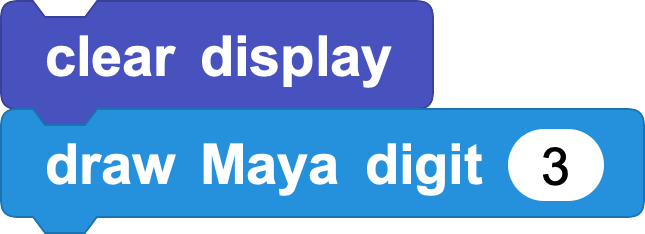
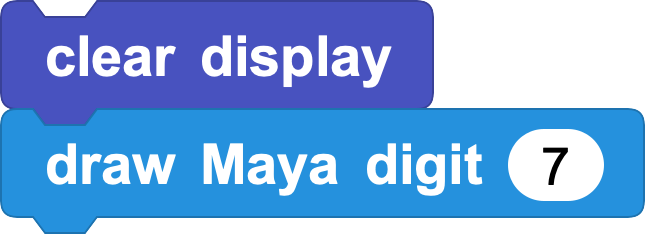
Now test the newly updated block to draw digits between zero and five, but add a clear display block before your draw digit one, or your new dots will be mixed up with the zero symbol:
Between Five and Ten
For digits between five and ten, we aim to reuse the code we've just composed, but additionally drawing the corresponding line. Let us take a look again at the grid of Maya digits:
Notice how the second row of digits is very similar to the first one, save for the line below the number of dots. Let us first compose some code to draw a full line in the third row of the micro:bit display.
In the same way that we've used a for loop to draw dots, we can loop five times over a particular row to fill it up completely, like this:
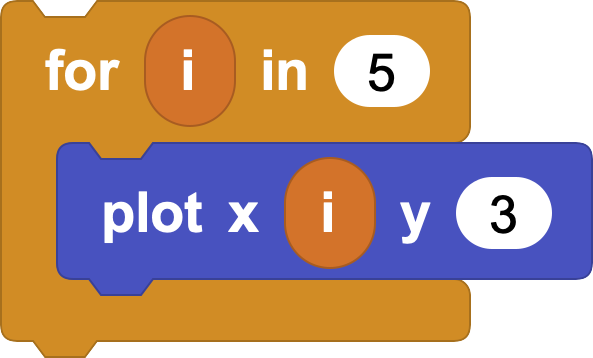
Click on the script to see how it draws a line at row 3 of the 5x5 LED display.
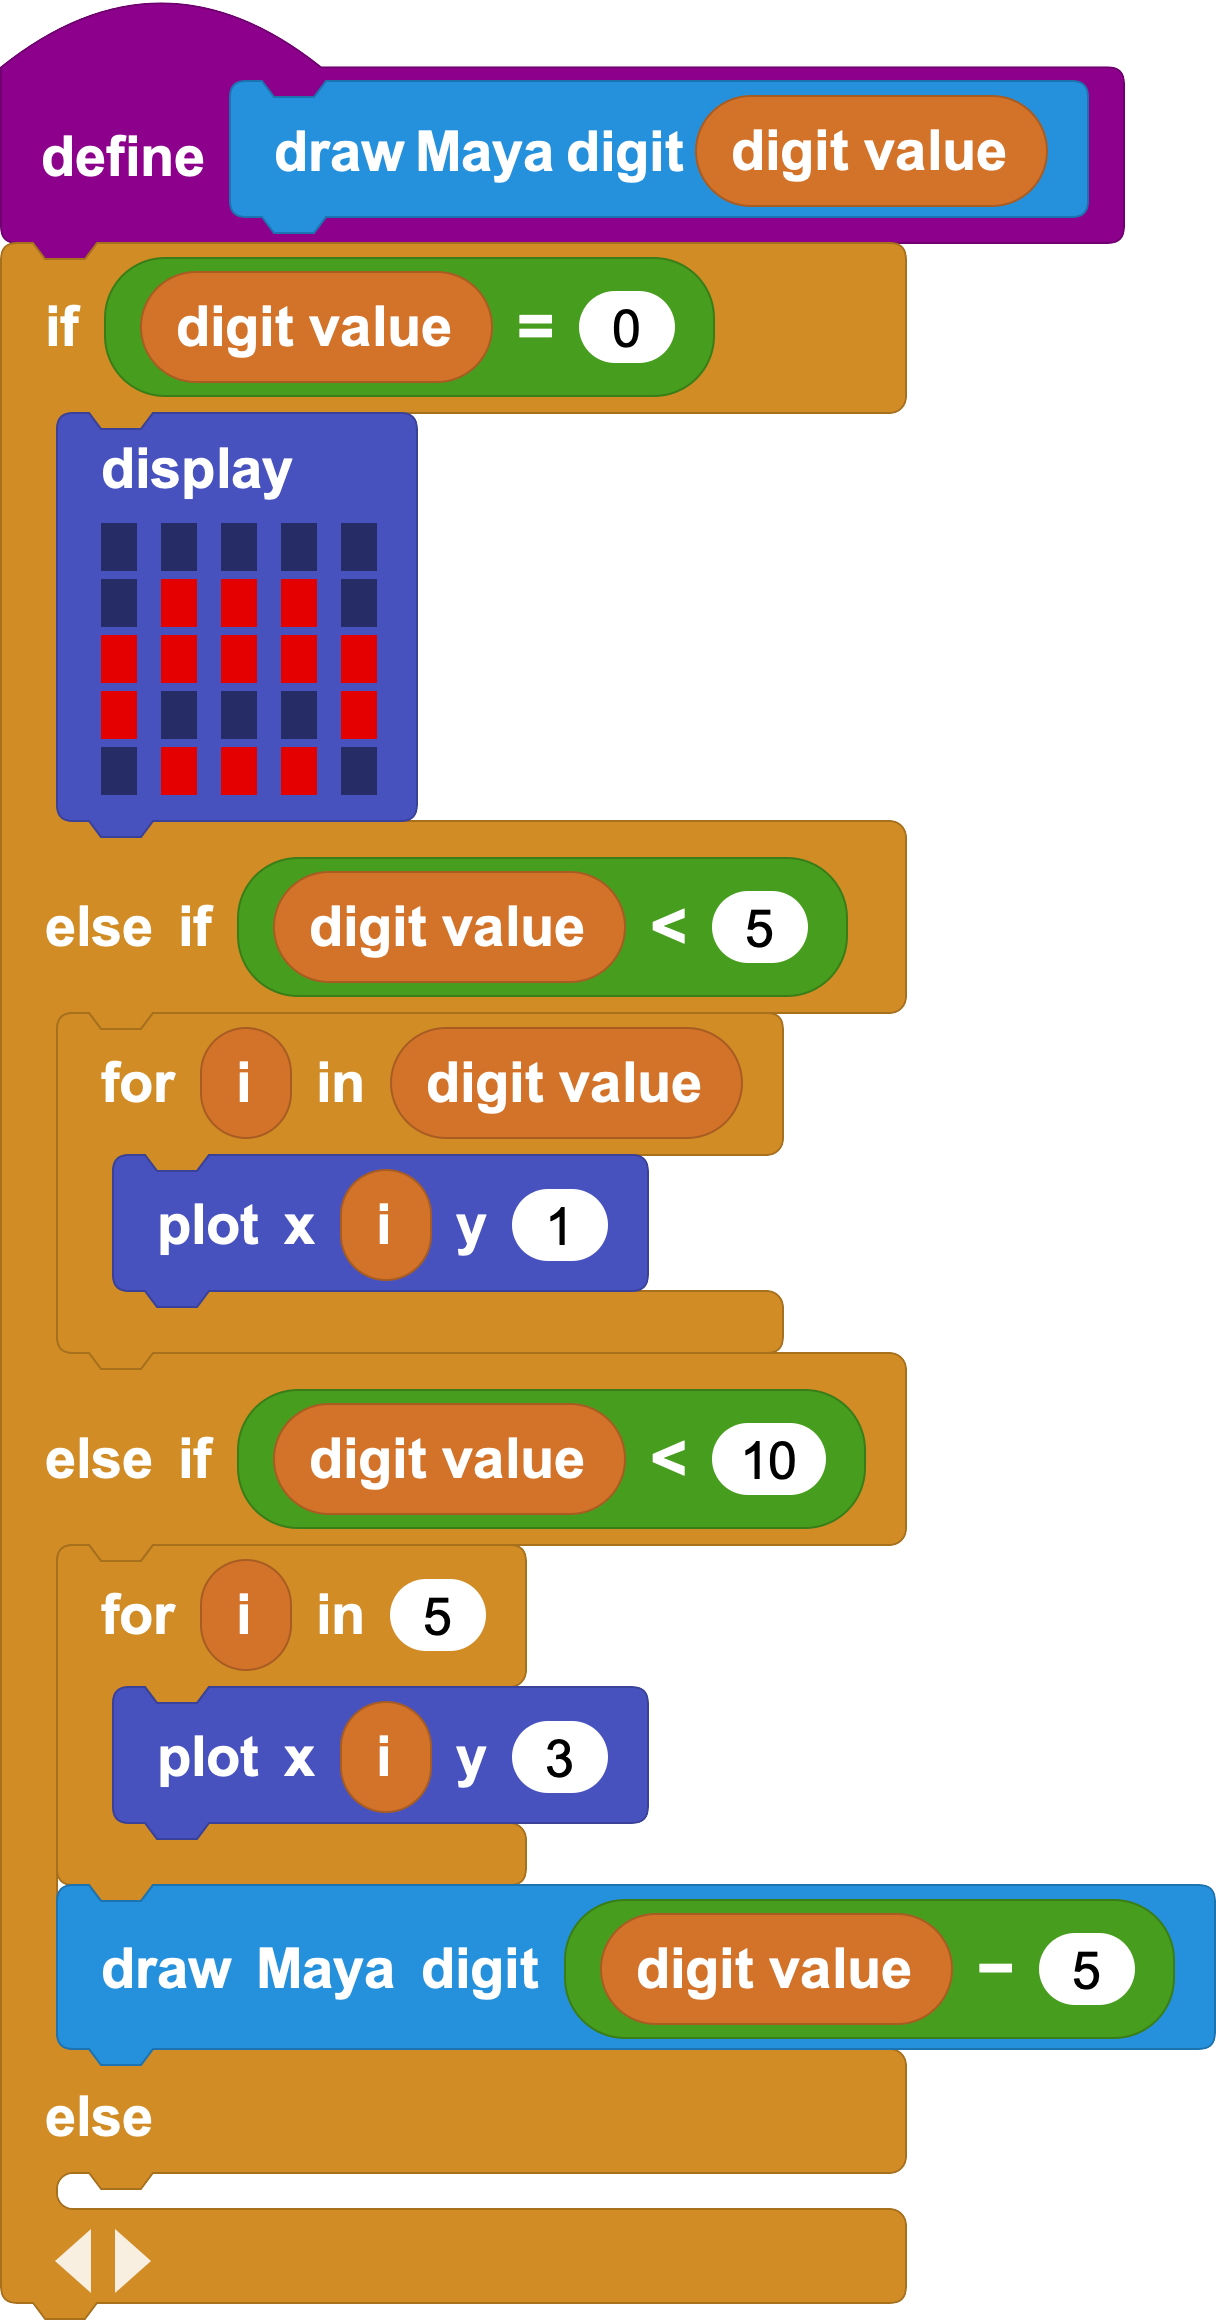
So, let us extend the draw Maya digit block once more, like so:
If you now try to draw digit 6, you will see a line appear on the screen, but it will be missing the additional dot. Remember that 6 is represented as  . Notice that, for any number between 5 and 10, we just need to draw a line and then the number of dots corresponding to the digit minus five.
For digit eight, for example, we'd draw a line and three dots. That is, a line and the digit corresponding to 8 - 5.
Since our code can already handle drawing digits lower than 5, we could just call it right from there!
It may look weird to define something in terms of itself, but that's actually very common practice in programming!
You can now test the newly extended block for all digits between 0 and 9, but making sure to clear the display between drawing each one:
If you have tried all the values, you'll have noticed that 5 does not work! Keep on reading to learn how to fix this issue.
Drawing All of Them
If we were to continue the trend to draw digits between 10 and 15, this is the kind of code that we may come up with:
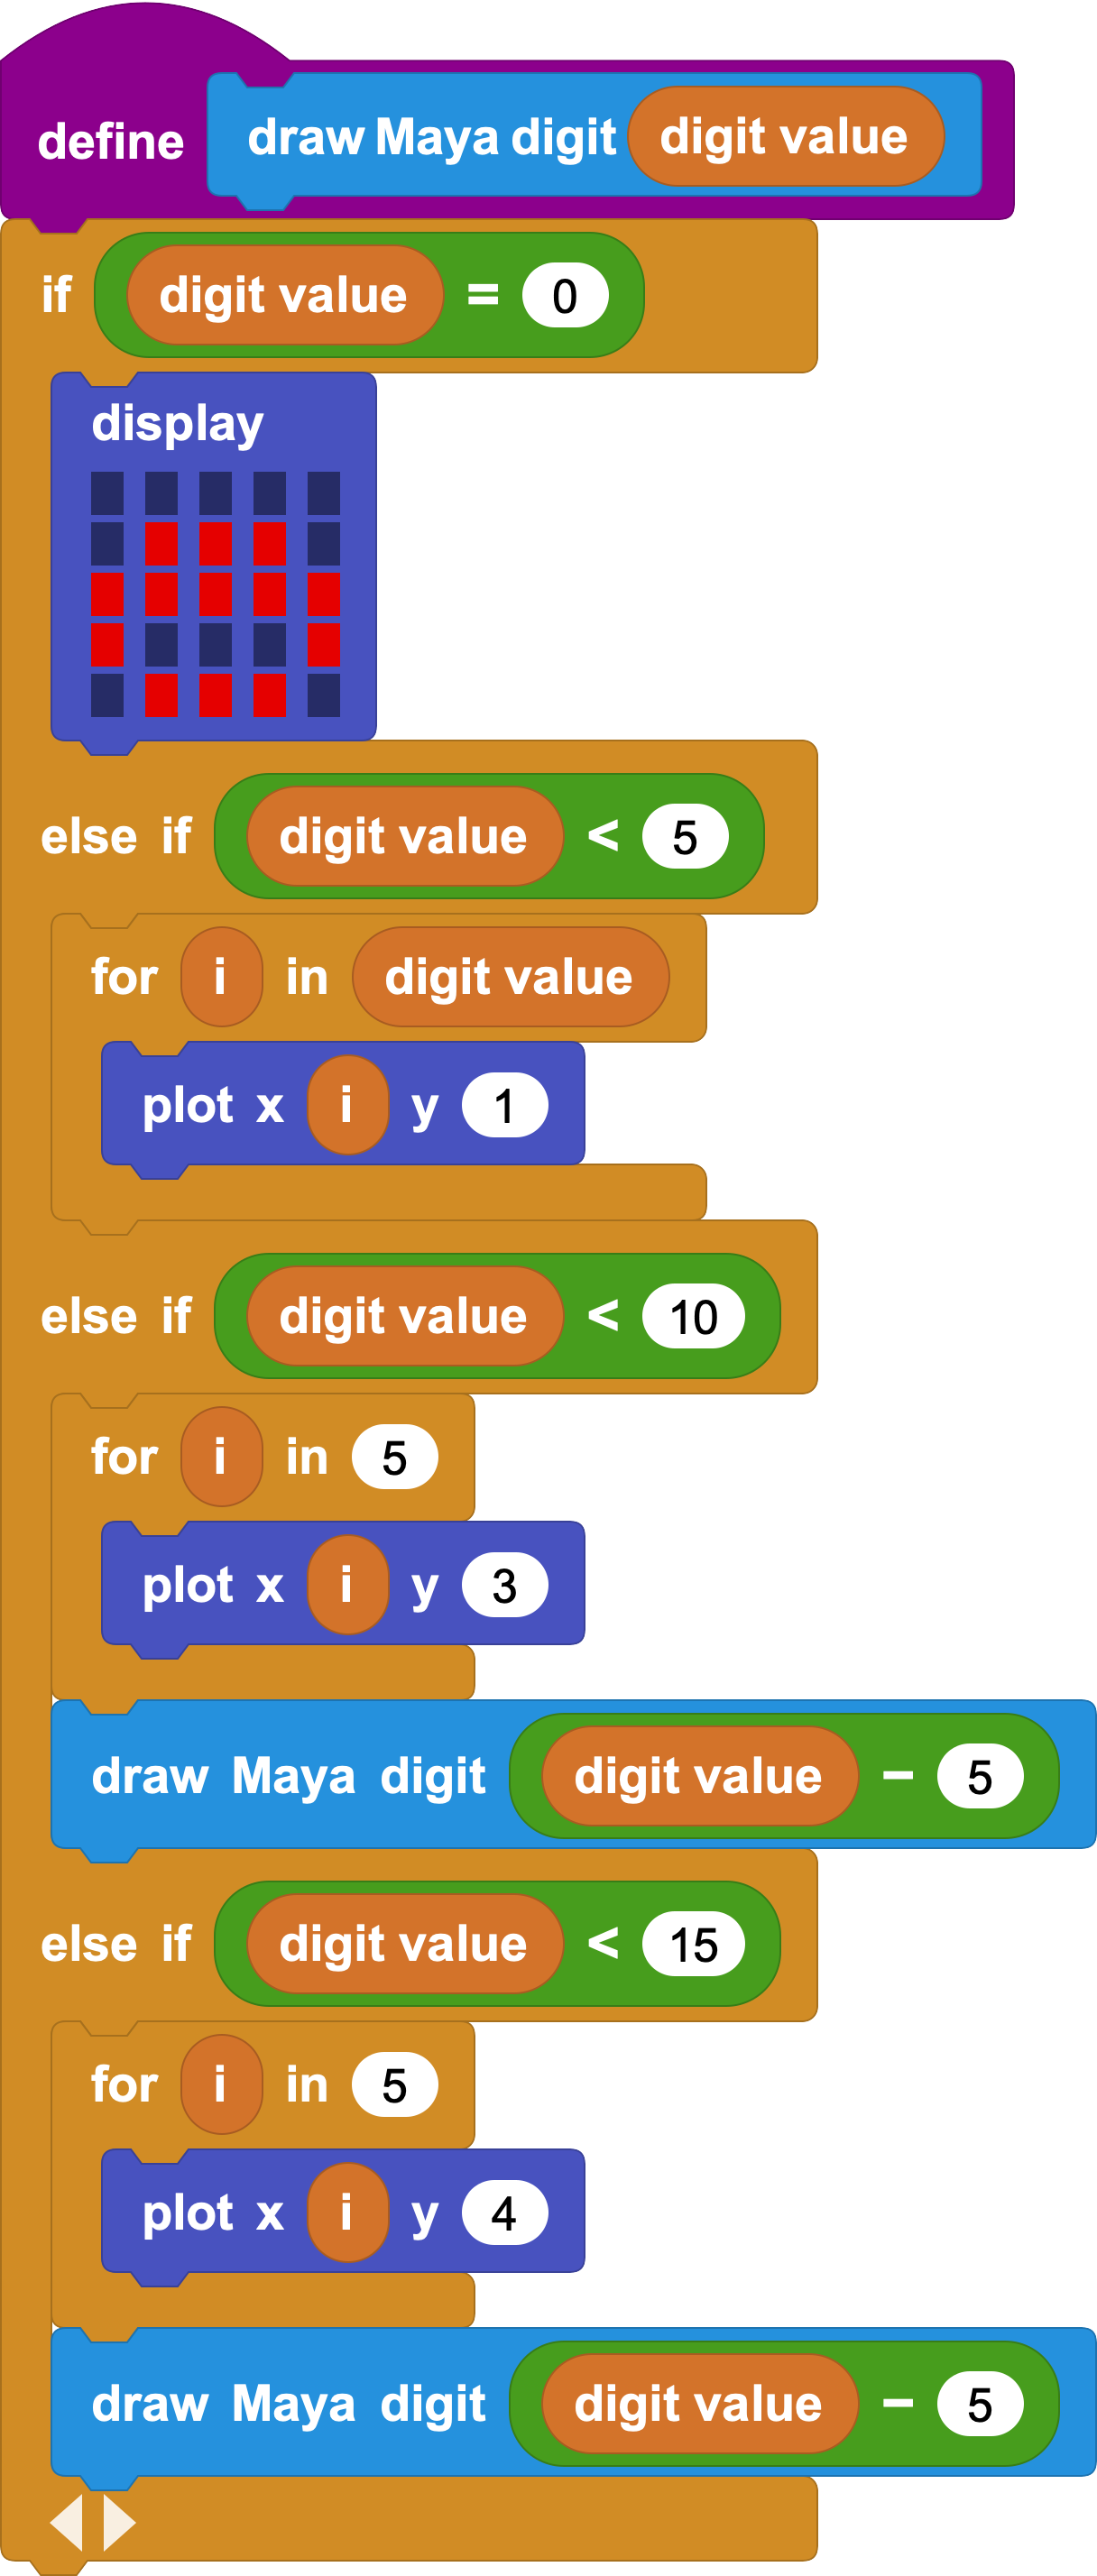
But notice how the case for digits between five and ten and digits between ten and fifteen is pretty much identical, except for the y coordinate of the plot block.
Let's look at the numbers. We need to add a line every five digits after digit four:
| Digit value | Number of lines |
|---|---|
| 0 to 4 | 0 |
| 5 to 9 | 1 |
| 10 to 14 | 2 |
| 15 to 19 | 3 |
Notice how the number of lines is equal to the integer part of the digit value divided by five, and since we should start drawing lines at the third row of the micro:bit display we can just add 2 to the calculation to get the y coordinate of each line, like this:
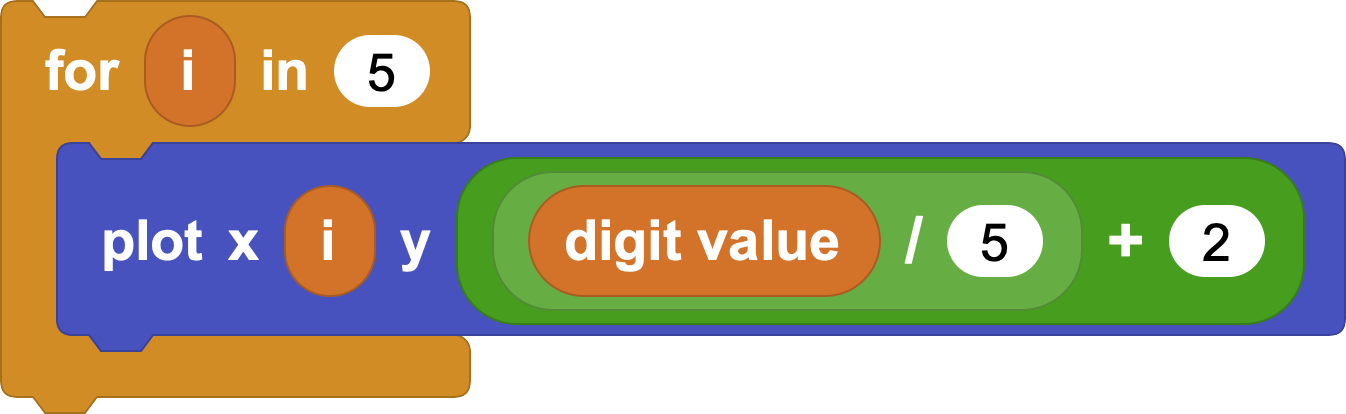
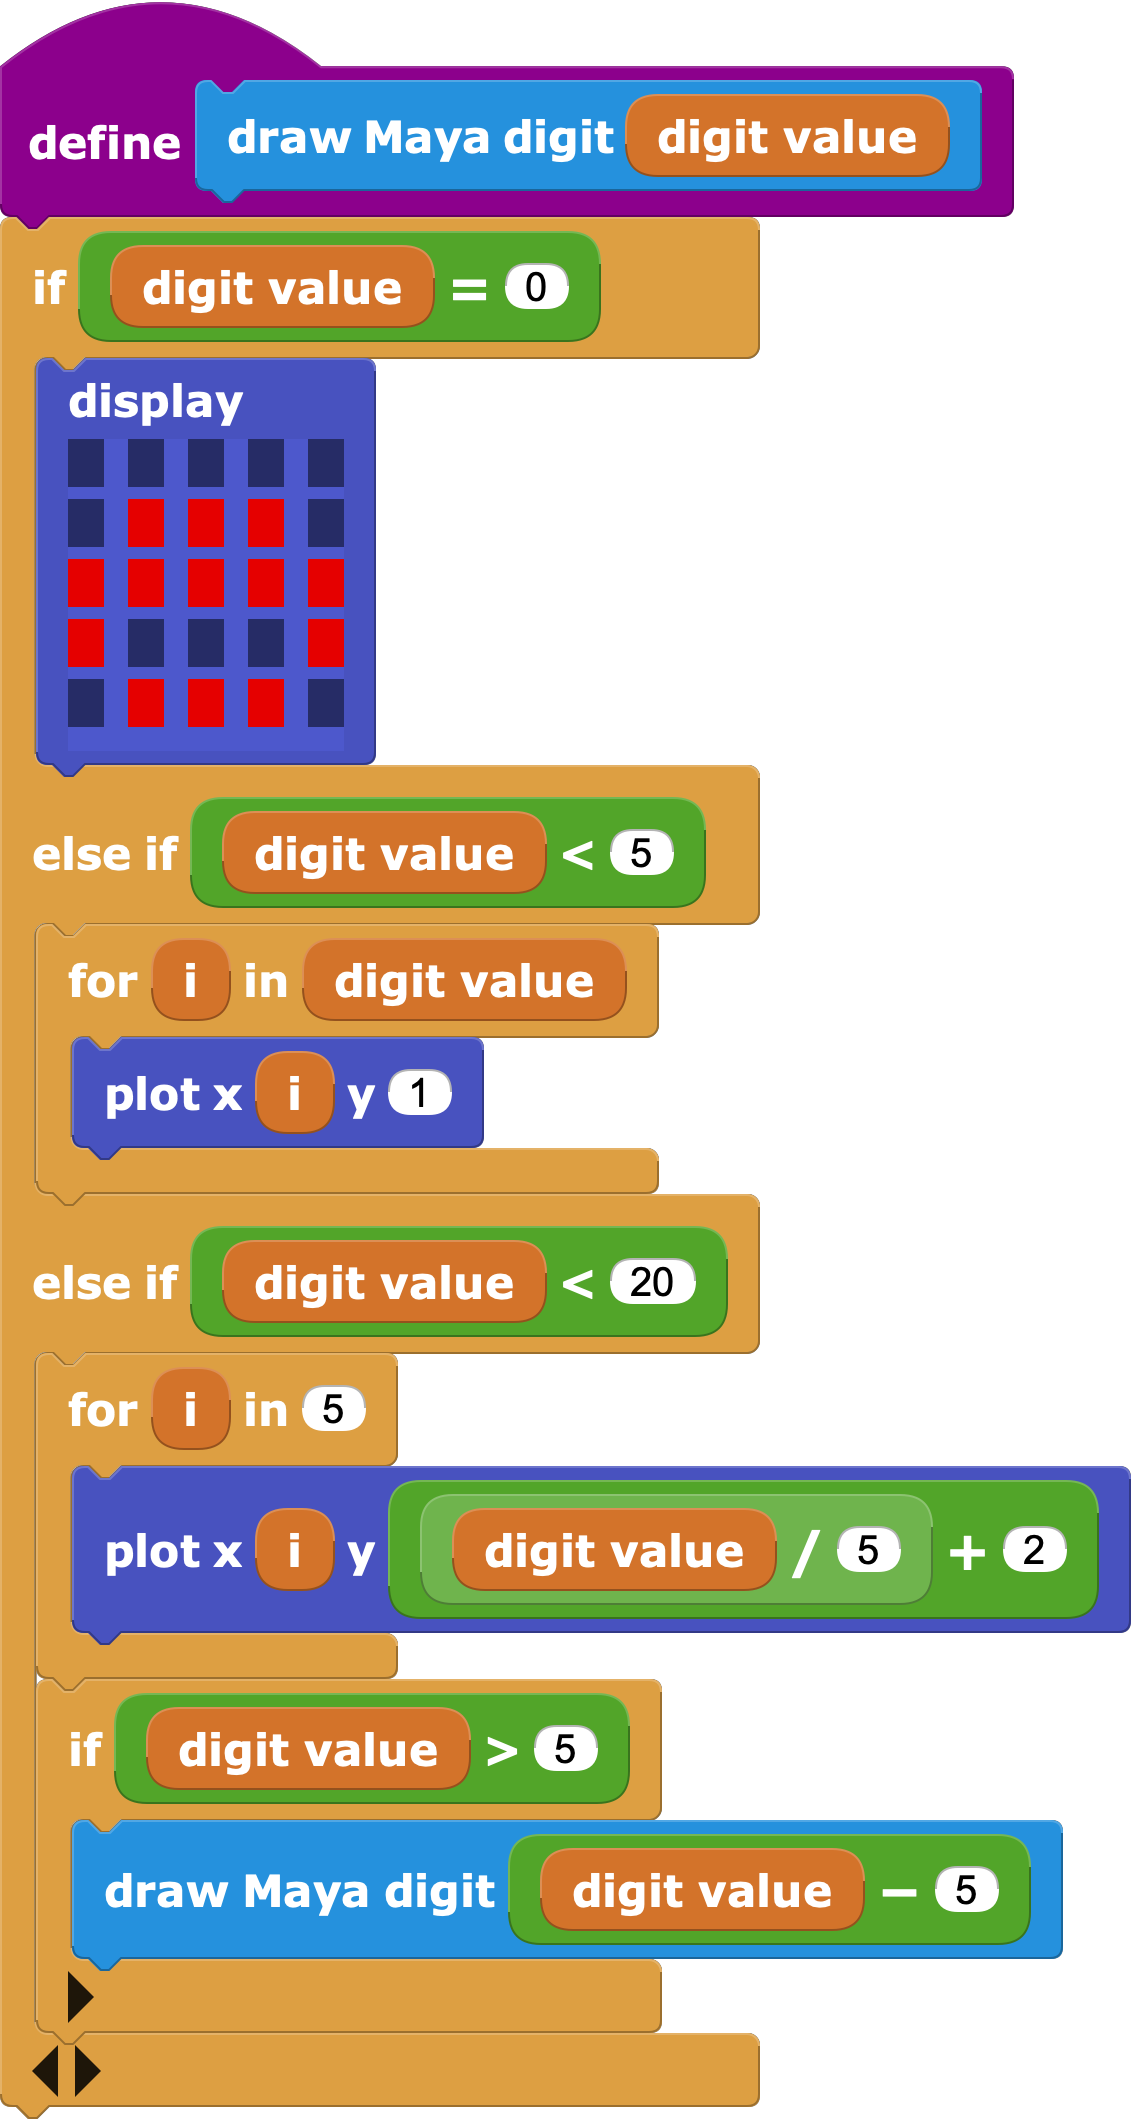
So, the generic code would look like this:

But this code, again, fails for multiples of five. The issue is that zero is being drawn on top of whatever other parts of the digit we're trying to draw, so we need to prevent zero from being drawn in all those cases.
An easy way to fix this is to only draw smaller parts of the digit for digit values greater than five:
You can now test every single digit between 0 and 19, and it should all work!
A Maya Digital Counter
Now that we have a block that can draw Maya digits, we could use the two micro:bit buttons to increment and decrement a digit shown on screen.
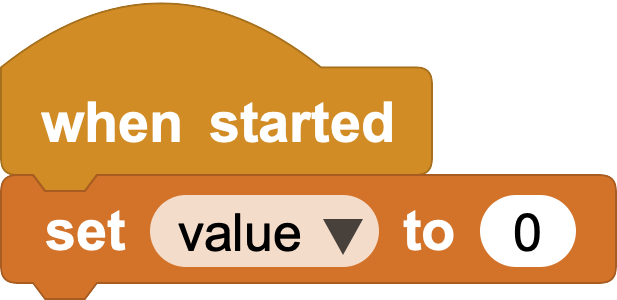
To begin, let us define a variable that will hold the value by clicking on the Add a variable button in the Variables category. Let us name it value, for example.
When the project starts, we'll fix that value to 0:
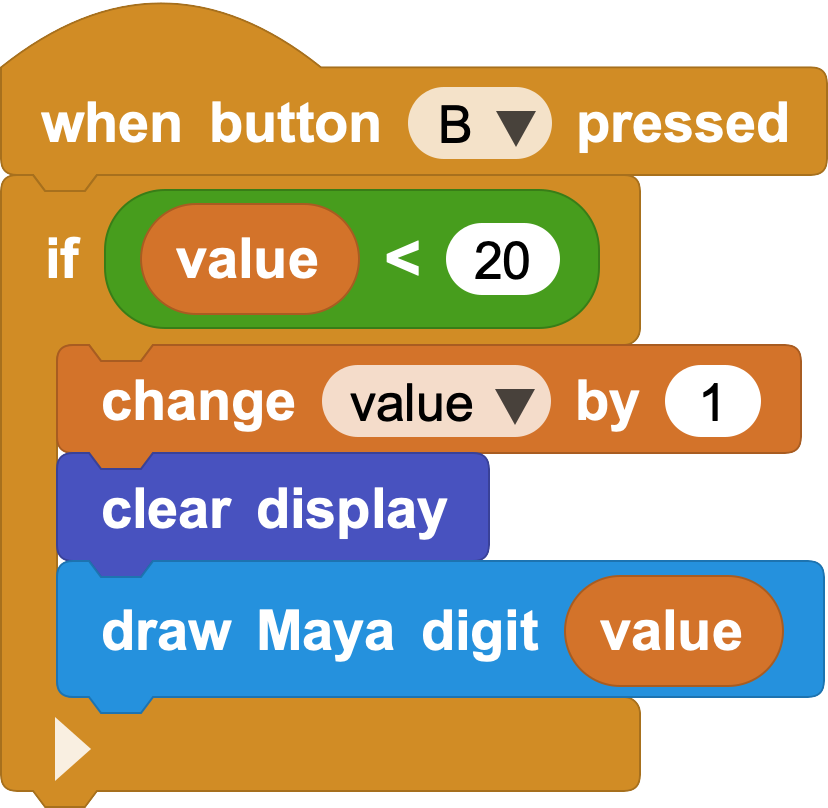
Button B will increment the value and draw it to the screen, while button A will decrement it. We will also make sure to stay between boundaries!

To Learn More: Going Over 19
Of course, a single micro:bit can only display one digit, but if you happen to have an additional micro:bit you could use it to represent a second digit.
We are going to use the radio capabilities of the micro:bit to communicate two boards together in such way that one is going to hold the units and the other one is going to hold the groups of twenty.
To begin, import the Radio library by looking for it in the library browser, that you can open by clicking on the + button next to the Libraries label, right below the list of block categories.
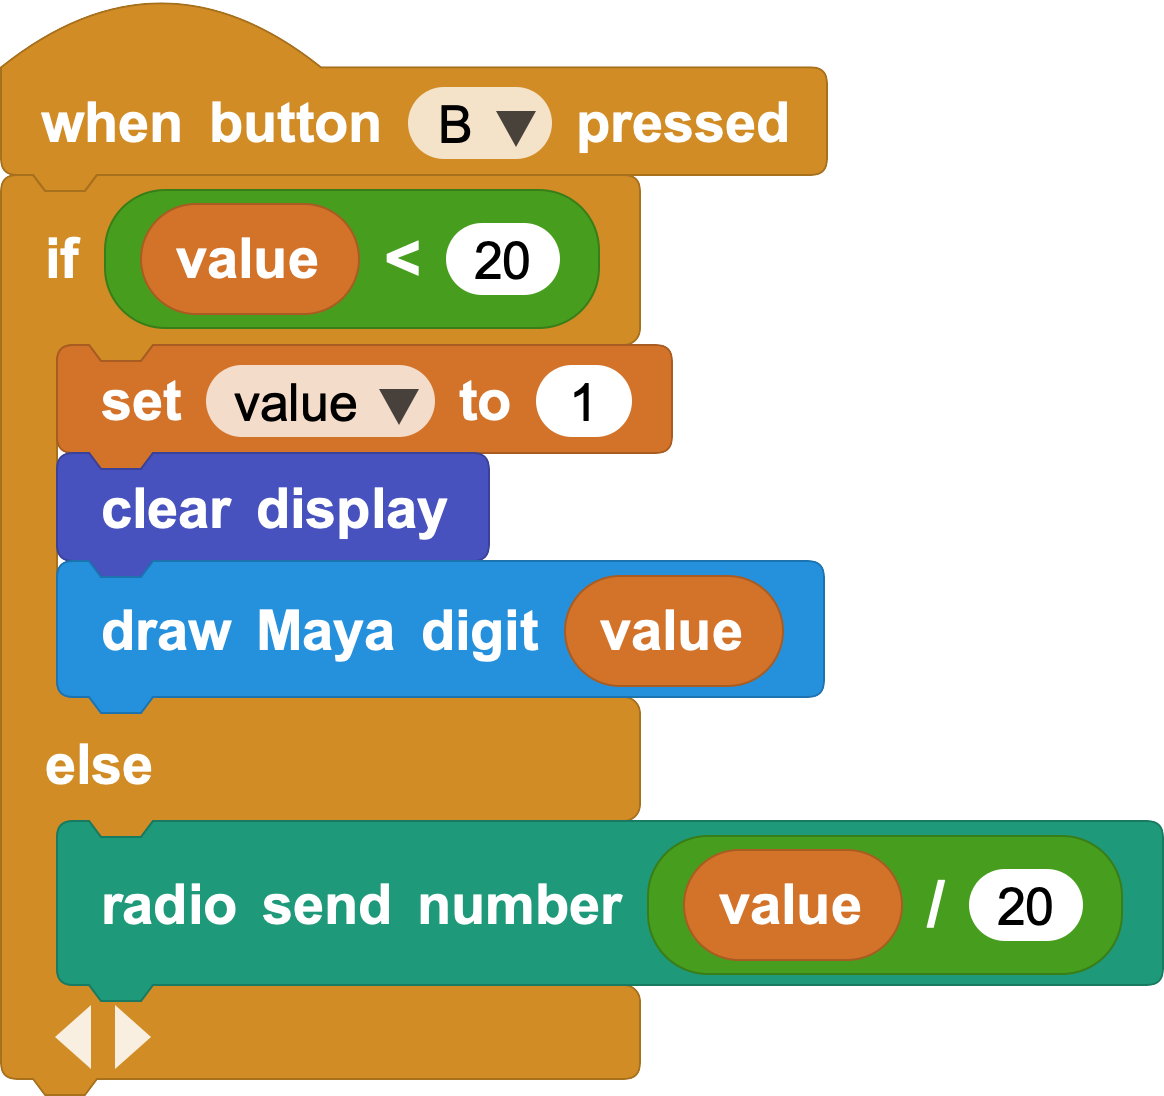
The idea here is to send the groups of twenty digit to another board once our value has overflown one single digit. That is:
The other board will receive a value that it has to draw on screen, and it can do so like follows:
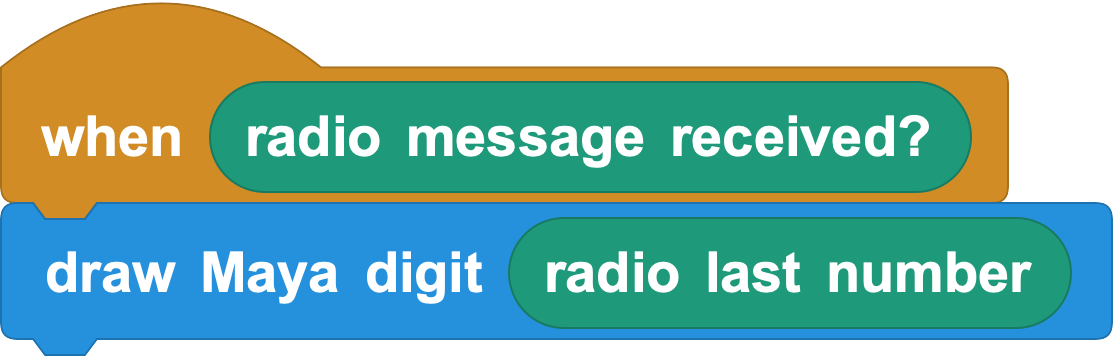
Note that this block will need to be "turned on" to work. That is, we either need to click on it or click on the "play" button at the top right of the MicroBlocks window.
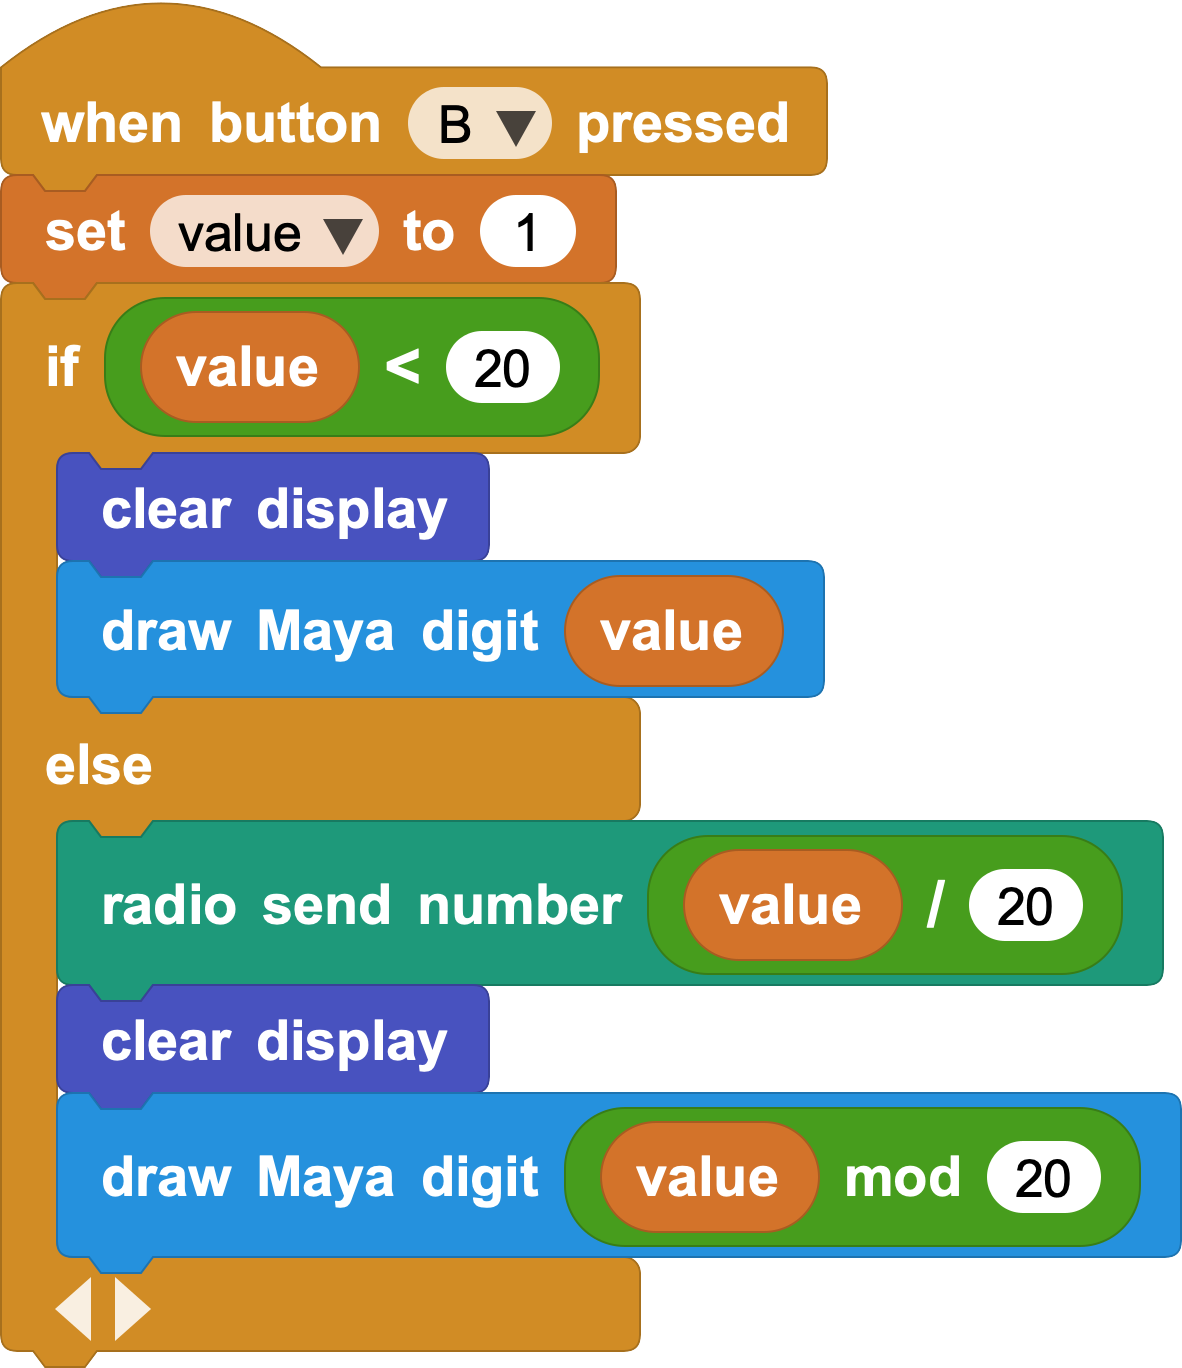
This does work, but now the sender board also needs to draw the remainder of the value divided by twenty. In other words, the radio receiver needs to draw the groups of twenty, and the radio emitter needs to draw the remaining groups of one.
To do so, we can use the arithmetic function modulo, that gives us the remainder of dividing two numbers together. In this case, we want the remainder of the value divided by twenty:
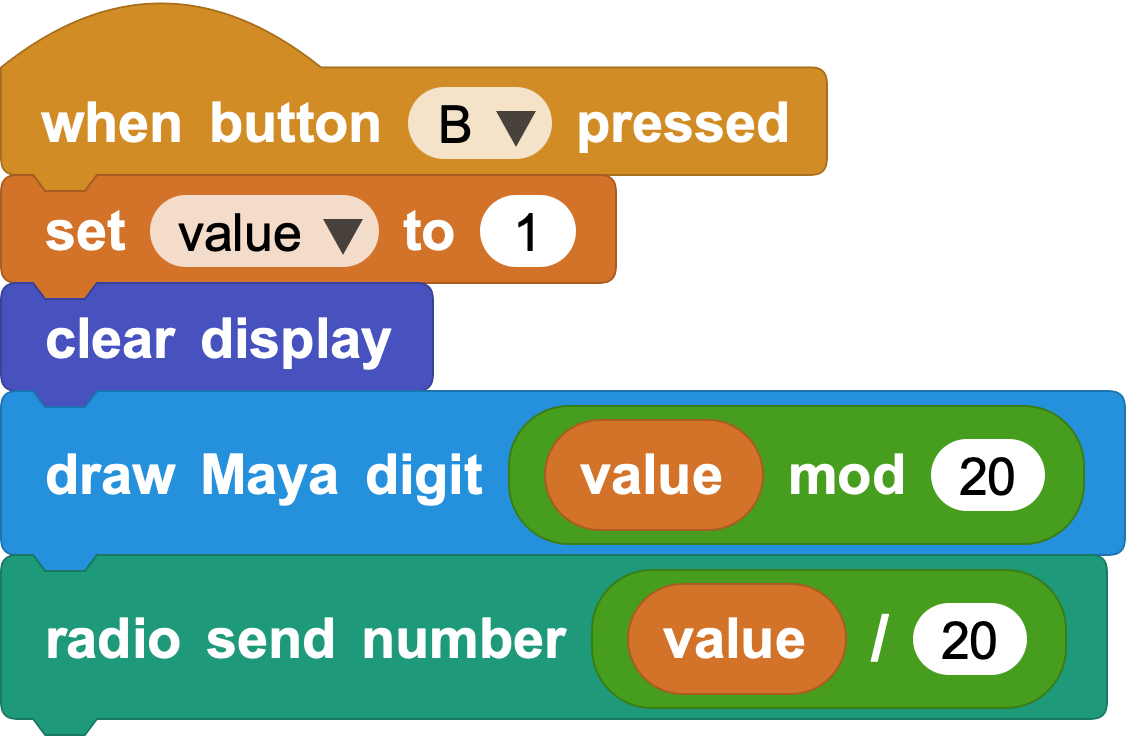
But, actually, we could simplify this script a lot by always sending the groups of five to the other board and drawing the remainder, without taking in consideration whether we're over 19 or not. Regardless of the value, this board is always going to show the lowest digit:
Finally, we should also send the groups of twenty from the script that decrements the value:

With this setup, you can now print numbers as big as 399 in Maya!
As an exercise left for the reader, could you think of a way to chain an arbitrary number of micro:bits to be able to draw even bigger numbers?