
Introduction
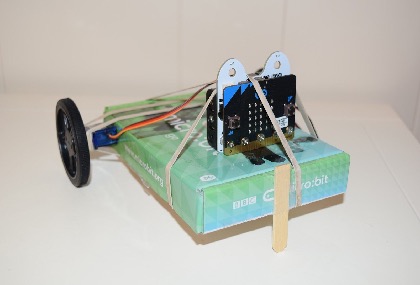
In this activity, students will build a micro:bit creature that moves and dances from a few simple parts: a micro:bit, the box it comes in (or something similar), rubber bands, servos, wheels, and a popsicle stick. Students will also explore the power of remote control to move their projects in creative ways.
This activity connects to many curriculum standards. Students may make connections to simple machines, discussing wheels and axles. There is also an opportunity to connect to physics concepts around motion.
Goal
Students will create a dancing micro:bit by affixing two continuous rotation (360 degree) servos with wheels to a box. Students will write scripts to control their project by adjusting the speed and direction of the servos and wheels.
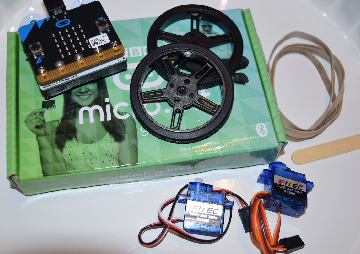
Materials needed
- micro:bit with battery pack and extension board (such as the ring:bit or basic:bit)
- 2 continuous rotation servos
- 2 wheels
- Small box (like the one many micro:bits come in)
- At least 4 rubber bands (#64, 3-1/2 x ¼ work well)
- Small popsicle stick
- Tape
Procedure
Introducing the Activity
One way to introduce this activity and gather background knowledge is to show students the materials they will use (or project the image above) and ask them what they think they might make.
Explain to students that these components will allow them to make their creation move in all sorts of directions - wiggle from side to side, turn in place, or move forward and backward.
It can be fun to brainstorm simple dances that students imagine their micro:bits performing!
Getting Set Up
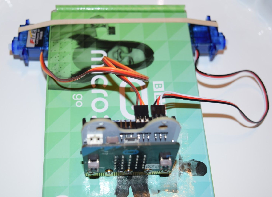
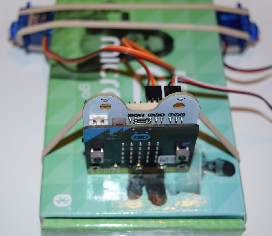
The first step in assembling this project is connecting the servos to your micro:bit. Here, we are using a ring:bit. Connect the servos so that the dark wire (black or brown) is connected to the "G" or ground on the ring:bit. If you are not using an extension board with its own batteries, you will need to attach a battery to your micro:bit. The micro:bit cannot power the servos using only power from the USB cable.

Next, using a rubber band, attach one servo to the box as you see in the picture below. Then, carefully slide the other servo under the rubber band on the opposite side.
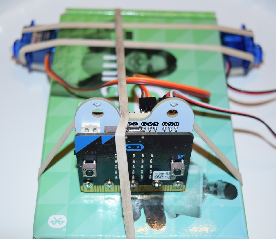
Attach an additional rubber band for support.
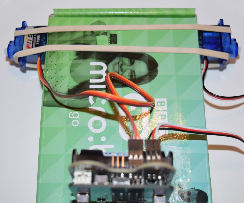
To mount your micro:bit on the box, attach a rubber band around the box widthwise.
The final rubberband helps hold the micro:bit more securely on top of the box. Stretch the rubber band along the box lengthwise.
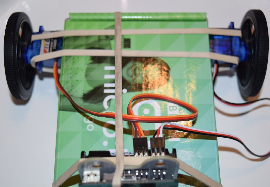
Next, affix the wheels to the servos. The screws that come with the servos can be used to secure the wheels if they fall off too easily.
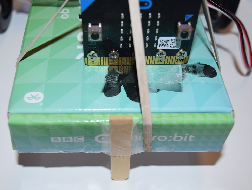
Finally, attach the popsicle stick to the end of the micro:bit so that it is opposite the wheels. This helps the box slide easily on hard surfaces, enabling the servos and wheels to pull the weight of the box as it dances!
Make it Move
Now that the box is assembled, students will want to make it move! Connect to MicroBlocks by attaching the USB cable to the micro:bit.
First, drag two set servo blocks into the scripting area and change one of them to control servo 2.


Encourage students to experiment with different numbers. What happens when they set two positive numbers? What about two negative numbers?
By setting two positive numbers, the box should turn in one direction. Two negative numbers and the box should turn , in the other direction. One positive and one negative will make the box move forward or backward.

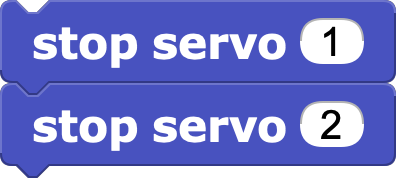
Once students have made the box move, they may want to make it stop and get ready for another dance move. We can use the stop servo block for that:
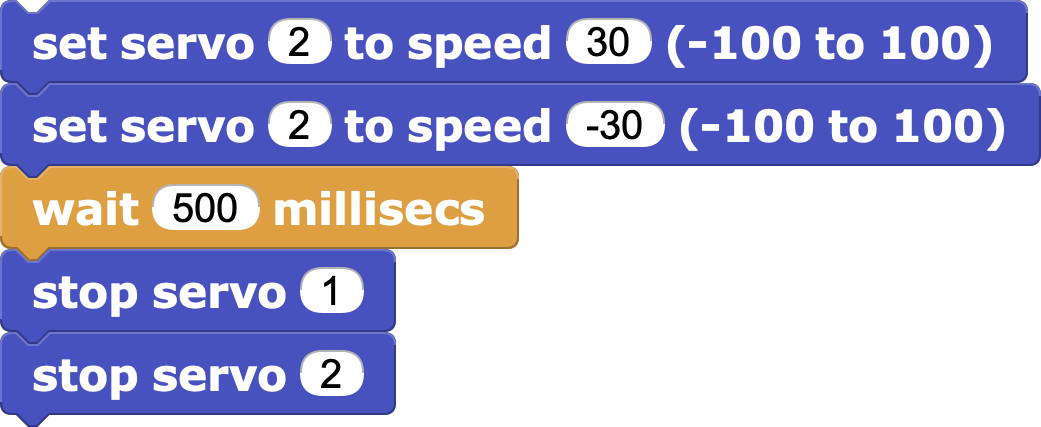
Put these scripts together with a wait block in between. When the program is started, the box will move forward and stop.
This is a great opportunity to show students how to make their own block in MicroBlocks! This code can be made into a block labeled forward. Click on the My Blocks category, add a command block, and name it forward. Next, move all the scripts previously under when started to define the forward block.
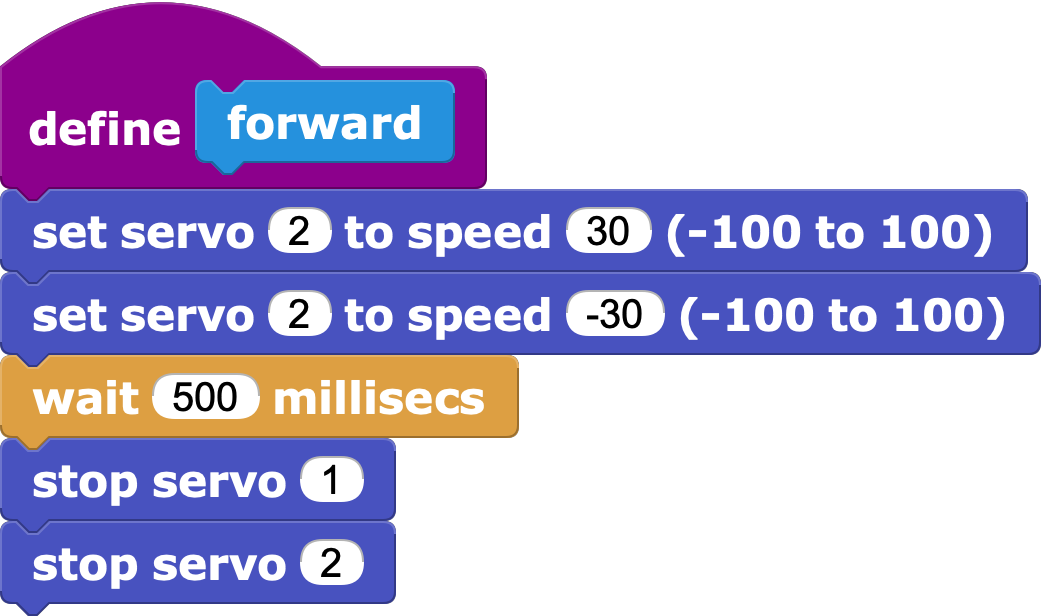
Drag the new forward block into the scripting area to use this new command. Encourage students to make different command blocks to make their projects move and dance.

Setting Up a Remote Control
Once the project is moving the way students would like, they may want to control it from afar. Students can write a code to use another micro:bit to control the micro:bit on the box. This will make their project hands free! This process introduces the concepts of remote control using radio blocks. Follow the steps below to set up a remote control.
Receiving a Radio Message
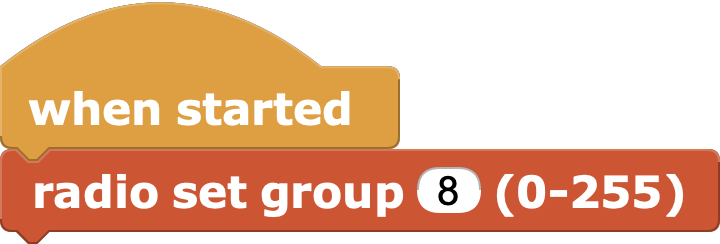
First, while the micro:bit on the box is still connected, add a radio set group block to its code under the when started block. Choose a number between 0 and 255 and remember it!
Next, add a when radio message received block and tell the box what to do when it receives the message.

Receiving a Radio Message
Save your current MicroBlocks project and open a new one to program your second micro:bit, which will act as a remote control for your dancing creature. Disconnect the micro:bit on the box and connect your remote control micro:bit to your computer. Add these two instructions for the remote control.

First, set the group to be the same as the micro:bit on your box. Next when button A is pressed, use the radio send number block to send the command to the micro:bit on the box. Any number will do, as we are just checking whether a message has been received without looking at its contents. Unplug the remote control micro:bit from the computer (make sure it has a battery pack attached) and control your project!
