
Overview
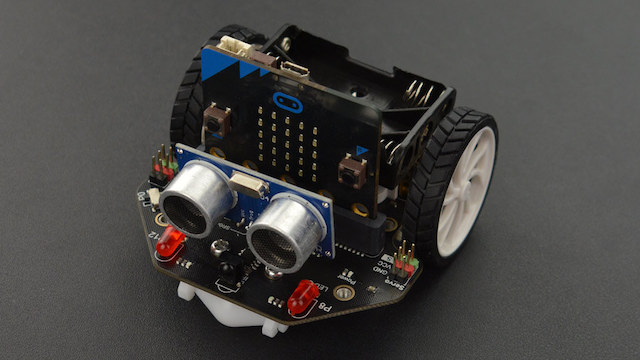
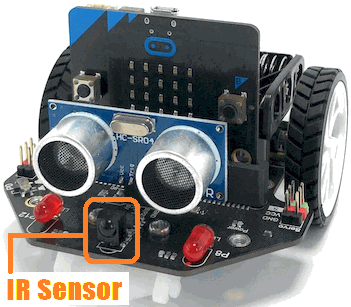
The Maqueen is a small, micro:bit controlled robot.
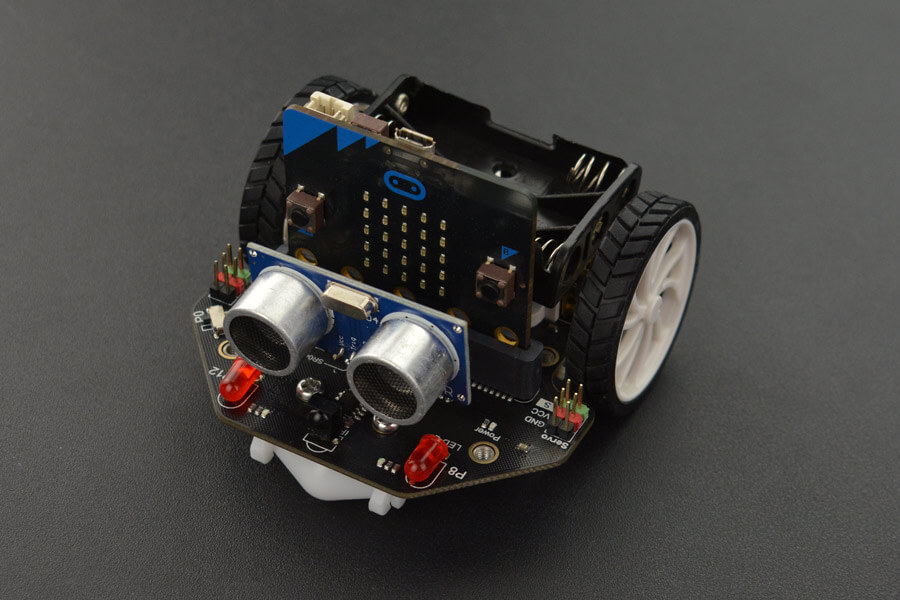
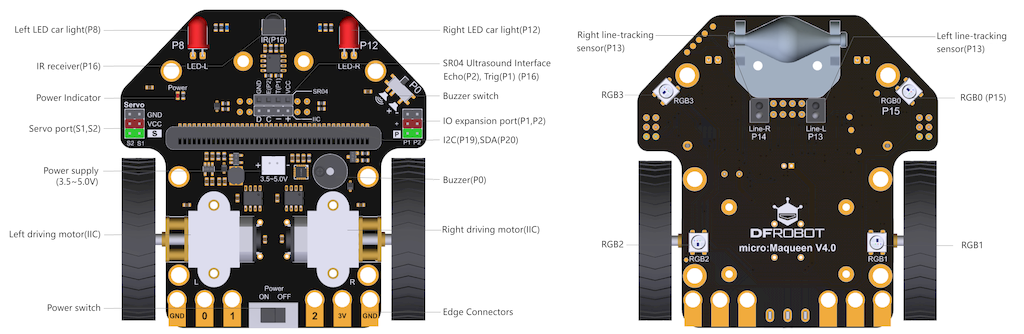
It features a line tracker, an ultrasonic distance sensor, LED headlights, an IR receiver, a buzzer, and four downward-facing RGB NeoPixels. It also has an I2C port, two servo Ports (S1, S2), and two Gravity expansion ports (P1, P2).
In this activity, we will program the Maqueen to be controlled by an IR remote control.
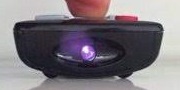
We used this simple IR remote:
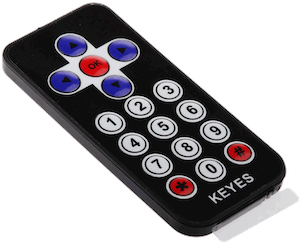
However, you can use any IR remote that uses the common NEC protocol. You can test a remote by running the Maqueen IR keycode block and pressing a key on the remote. If that block returns a number, then the remote will work, although you'll need to use the key codes sent by your own remote.
Scripts
Libraries
This activity uses two libraries:
- Maqueen (in the Robots folder): to control the features of the car.
- NeoPixel (optional): to use the colorful NeoPixel LEDs under the car.
To load these libraries, click on + next to Libraries and add the library.
IR Basics
Let's review the operation of the IR remote control.
Anytime one of its keys are pressed, the remote control emits an invisible sequence of long and short flashes from the infrared (IR) LED located in the front of it.
An IR receiver located at the front of the car receives and decodes the IR signal.
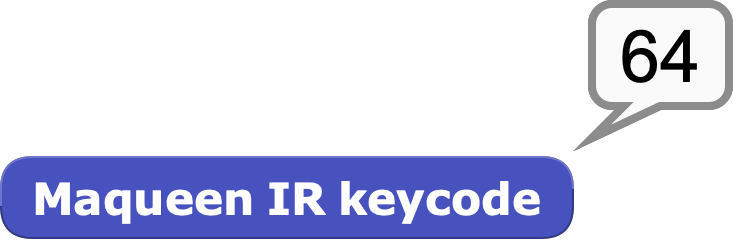
In order to read the codes in our MicroBlocks program, we need to use the Maqueen IR keycode block. This block returns the numeric code decoded when it receives an IR command. Here we see the result of pressing the OK key on the remote:
Key Controls
Our program will use 15 keys to control the car:
- 0-9 keys: set speed
- Arrow keys: set direction
- OK key: stop
To adjust the car speed, simply press one of the numeric keys 0-9. The 0 (zero) or OK key will stop the car. Keys 1-9 set the speed from the slowest to the fastest. Press one of the direction arrow keys to activate the newly selected speed.
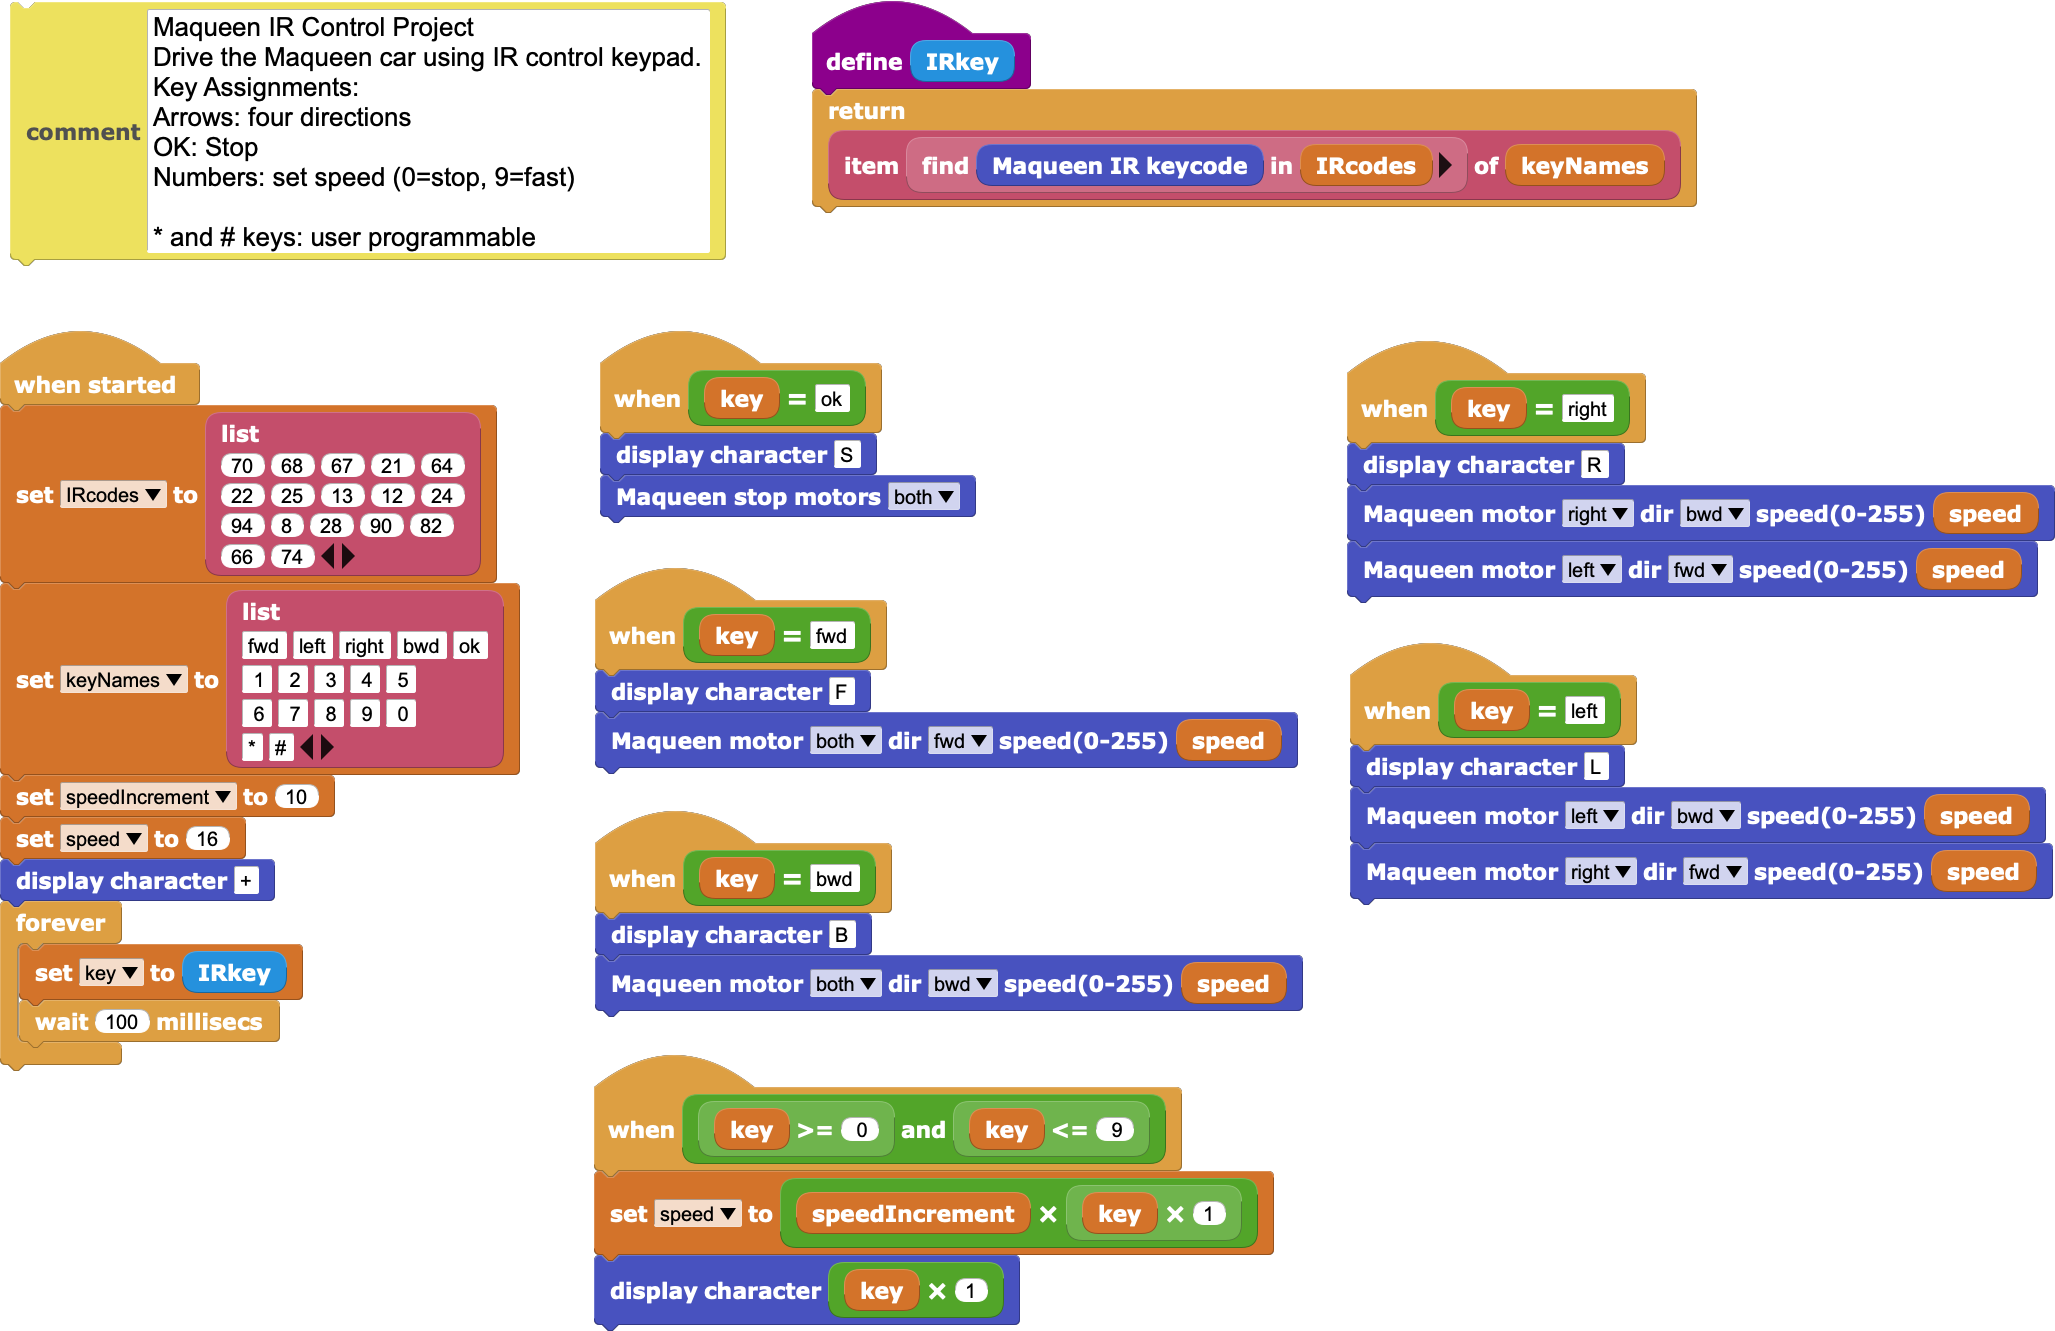
Code
MicroBlocks is a real-time, multi-tasking environment. This means that we can write our code such that various conditions are detected and acted upon in parallel.
The conditions that we have to take care of are various IR key code values that represent the directional changes, as well as the speed adjustments. Our program consists of groups of when [condition] blocks that handle all these.
When the Run icon is clicked, all the when blocks start running, evaluating their assigned conditions and acting accordingly.
Custom Block: IRkey
In our project, we are going to make use of the IR codes emitted by the remote control and detected by the sensor on the Maqueen.
As we have seen above, the keypresses result in various numeric values, that by themselves have no meaning and hard to associate with the movements of the car.
To make our lives easier, we want to write a small custom block that will enable us to assign meaningful names to the numeric key values.
There are 17 keys and therefore 17 numbers generated.
We want to create a list of these 17 keycodes, and associate them with 17 key names that we want to refer to them by. This will allow us to deal with the keycodes by names instead of numbers.
So we create two lists:
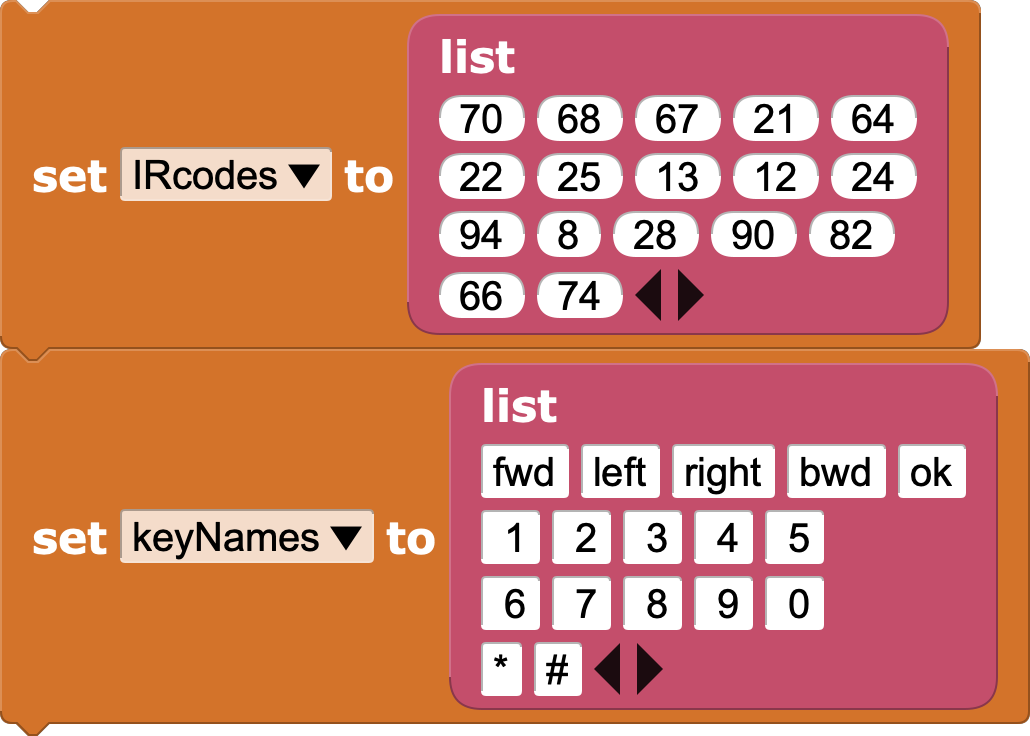
- first one called IRcodes, that will store the numeric codes
- second one called keyNames, that will store the names assigned by us.
When get a keycode from the remote, we'll look up the keycode in the first table (IR codes). Then we'll use its location index to extract the name for that key from the second list (keyNames).
To accomplish this, we'll use two data category blocks:
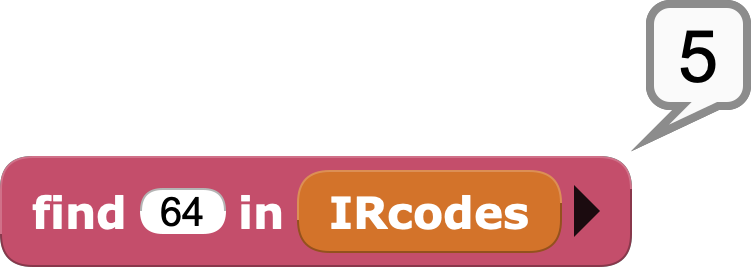
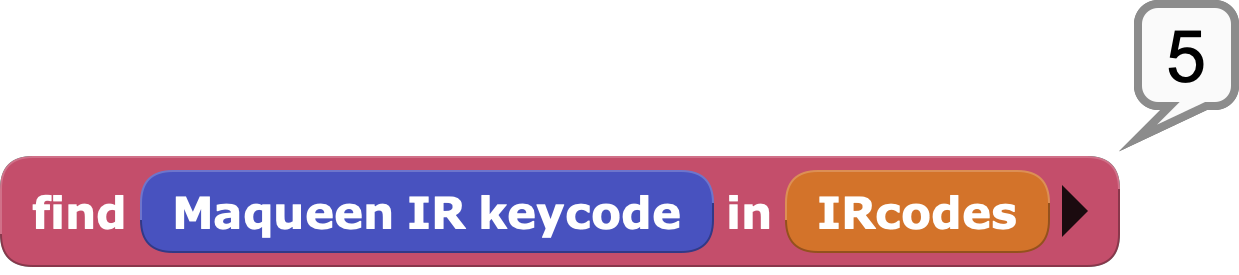
The find block enables us to search the IRcodes list for a keycode we want to locate. Using the example of the OK key (value=64), this block will return the value of 5; meaning numeric code 64 is found in position 5 of the list.
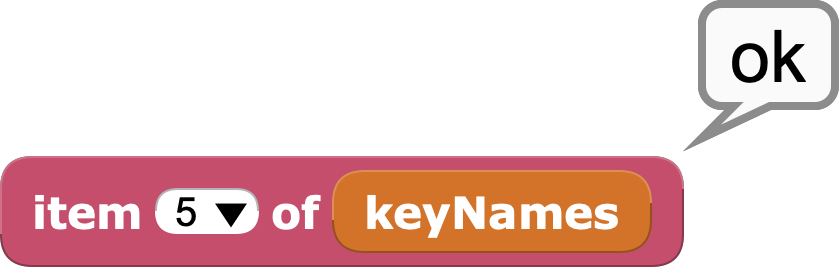
Now that we have this information, we can use it to look up the key name we have assigned to that value. We do this by using the item n of block. This block returns the value stored in the nth position of a list. In our case, we want to retrieve the key name stored in 5th position of the keyNames list: ok
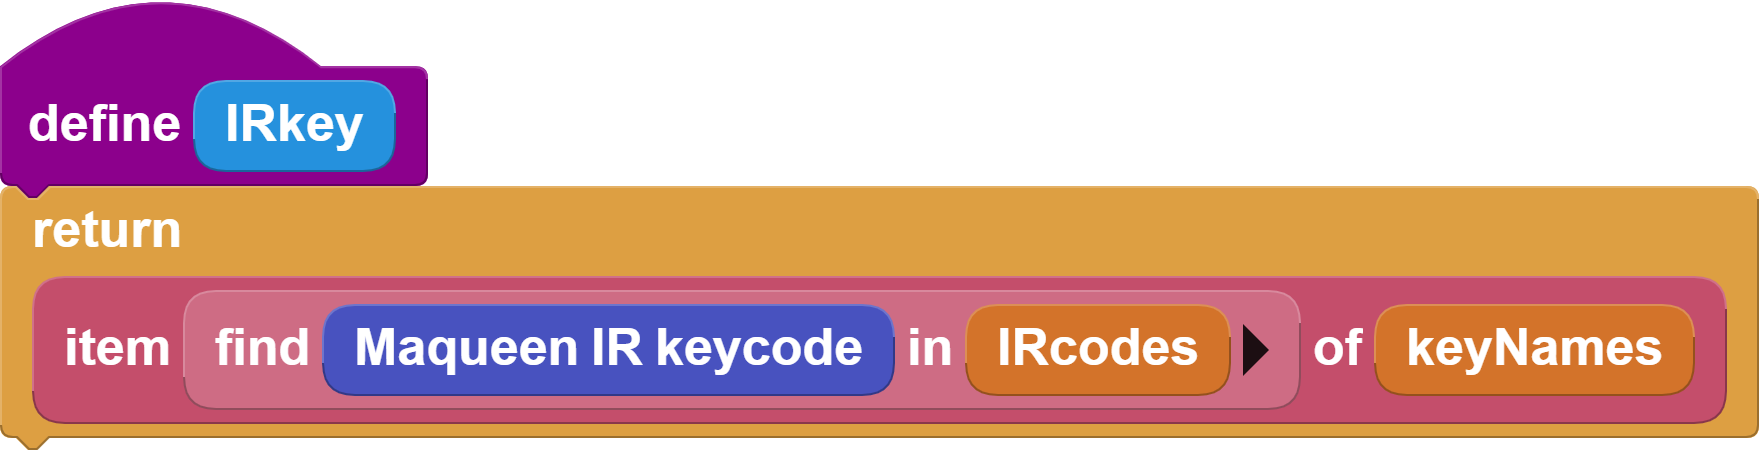
By combining these two operations in a custom block IRkey, we gain the ability to convert any numeric IR code to a name we have assigned.
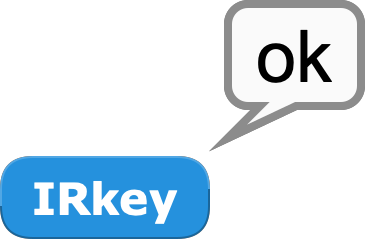
So if we execute the IRkey block and then press the OK key on the keypad, it will return the name of the key (ok) instead of its numeric value (64).
We are ready to use this very helpful block in our program.
When Started
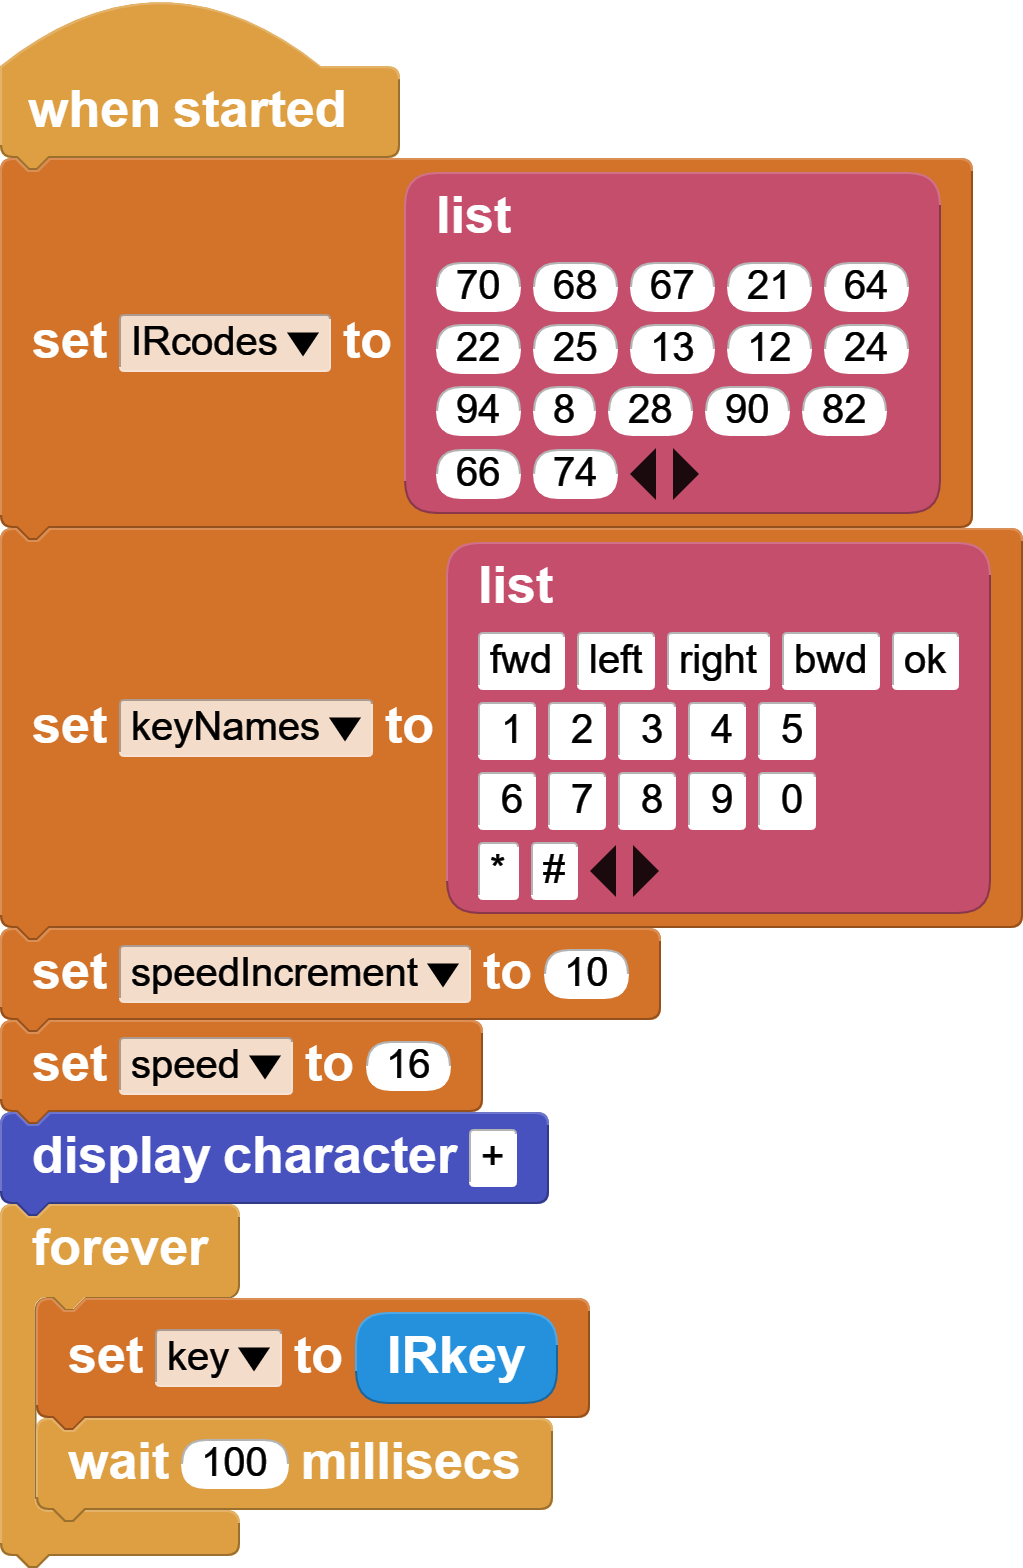
This group of blocks define the lists and variables of the program. We have already talked about the two lists for the IR codes.
Let's examine the two variables:
speedIncrement: Speed values for the Maqueen motors range from 0-255. However, anything over 100 might be too fast for any type of table top operation. To scale it a bit down, we use this variable and multiply it by the speed key (0-9) to arrive at the actual speed.
The initial value for this variable is set to 10 and produces speeds in the range of 0-90. If later on you would like to operate the car faster than this, just change this value to another one, maximum being 25.
speed: Initialized to 16, it sets the starting speed for the motors. If needed, you can adjust it to match your needs.
After the lists and variables are initialized, we enter a loop. In the loop, we continuously read the IR sensor value and store it in a variable called key. This key variable is then used throughout the program to determine the car actions.
When key = ok
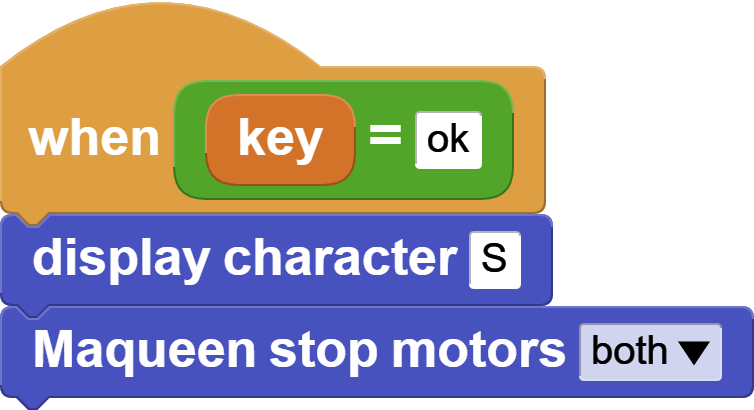
OK key is used to stop the car. We also display the letter S on the micro:bit display as a feedback.
When key = fwd

fwd key is used to move the car forward. We also display the letter F on the micro:bit display as a feedback. Notice that this and other movement commands use the speed variable to set the speed.
When key = bwd
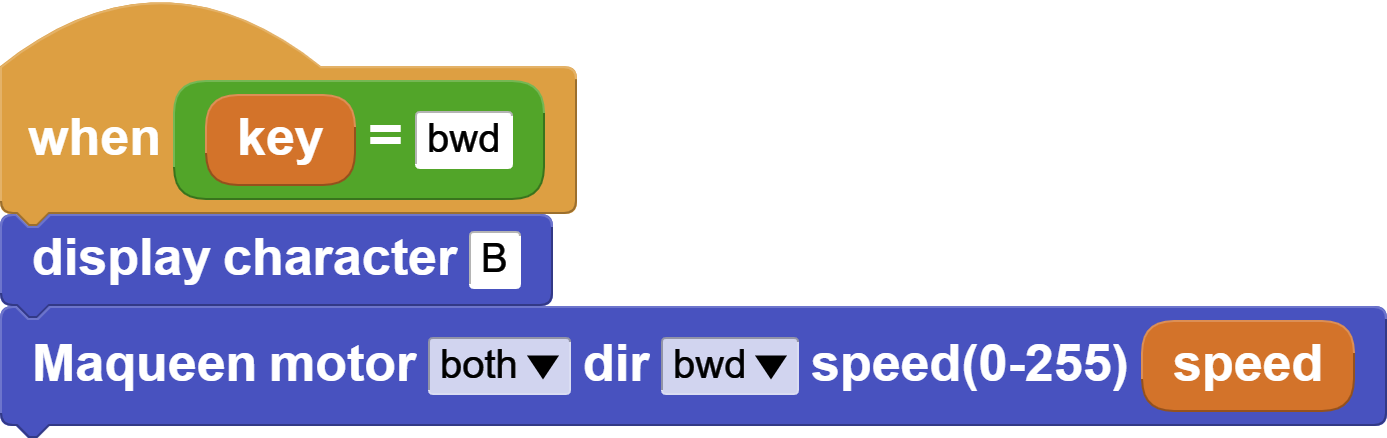
bwd key is used to move the car backward. We also display the letter B on the micro:bit display as a feedback.
When key = right
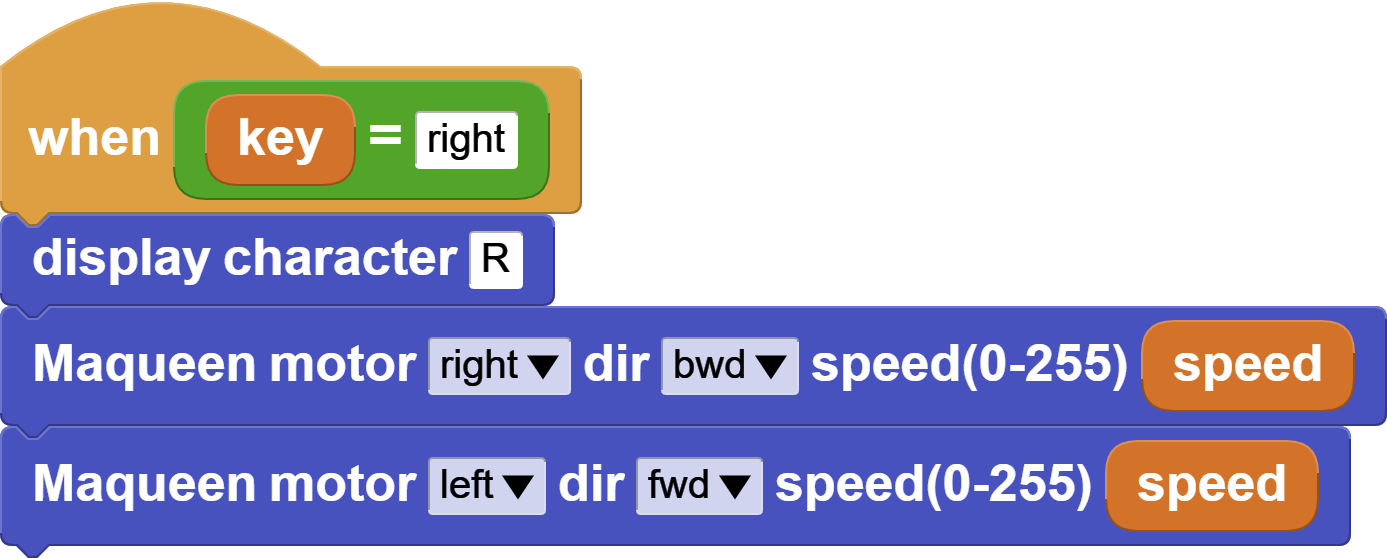
right key is used to put the car into a right turn. Right turn is executed by turning left wheel forward and the right wheel backward. This makes the car turn on the spot, covering less space while moving. We also display the letter R on the micro:bit display as a feedback.
When key = left
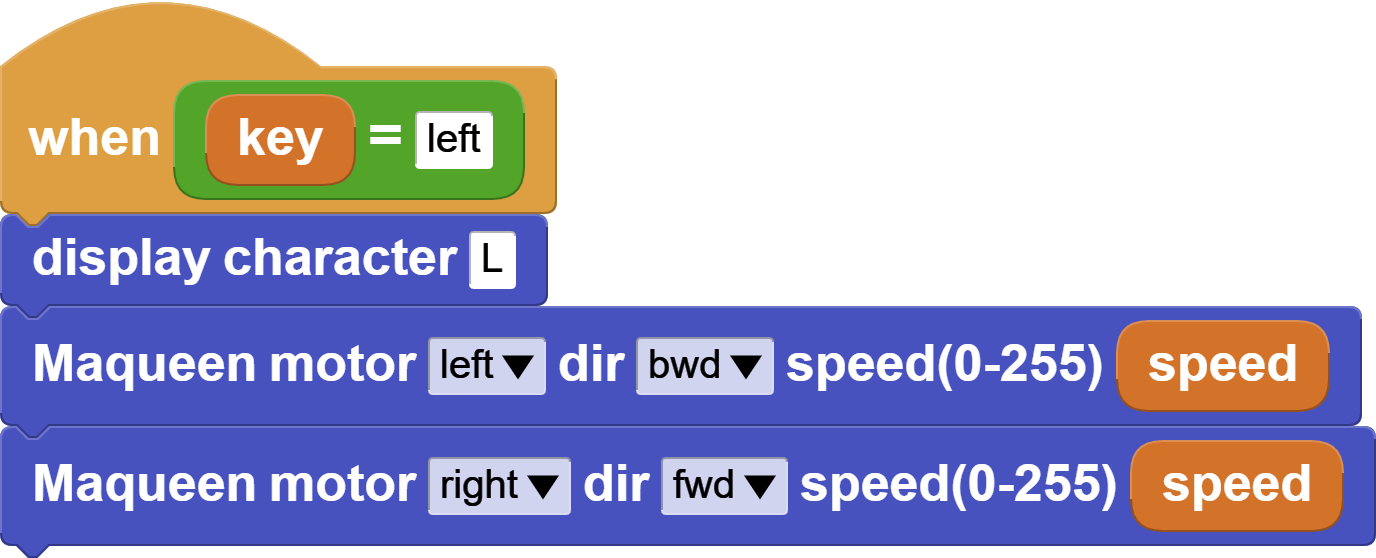
left key is used to put the car into a left turn. Right turn is executed by turning right wheel forward and the left wheel backward. This makes the car turn on the spot, covering less space while moving. We also display the letter L on the micro:bit display as a feedback.
When key >= 0 and key <= 9

This block controls the speed of the car, and sets it according to the value 0-9 detected. As mentioned above in the speedIncrement description, the speed is calculated based on the increment value. We also display the key value 0-9 on the micro:bit display as a feedback.
Discussion
As you use this program to control the car, you will notice that IR signals are very much directional. Either the remote control must be pointing directly at the sensor on the car, or the signals must be able to reach the sensor by reflecting off a wall or other surface. When the car is moving away from you, it is not easy to send controls to it.
How can we improve IR reception and eliminate the problem?
One possibility is to erect some barriers around the testing area and see if we can use them to bounce the signals to the car. Experiment with different layouts to improve the IR signal reception.
What additional of features of the Maqueen might we add?
There are 17 keys on the remote control but we only programmed 15 of them. The keys * and # are not used yet. What might you do with those? Check out the Maqueen library blocks and see what you can come up with.
Here are some additional enhancements you might entertain:
- Try to speed up the car's movements.
- Use the distance sensor to avoid collisions.
- Combine car movements with tones or music.
- Use the four NeoPixel LEDs under the car.
- Use the two red LEDs on the front of the car as turn signals.