Overview
This activity takes us through the conceptualization and development of an app to monitor visitors in a shop, or a different place, using a micro:bit board.
The guidance follows the steps taken in a real app or physical computing project. During the activity, we will initially analyze the problem to brainstorm potential solutions, with their pros and cons. The solutions will rely on concepts like variables, sensors, acceleration and radio wireless communication.
Parts
We will need two micro:bit boards. But depending on the decisions taken by the students, there will be more needs to build the mechanism (tape, cardboard,…).
- A micro:bit board with battery
- A micro:bit board (battery optional)
- Class materials (cardboard, scissors, tape, etc.)
Knowledge
The recommended concepts to perform this activity are variables, sensors and radio.
Setup
The usual chapter helping to set up the required parts is different in this activity. Since there are several approaches, we mixed this information directly in the process.
Process
The process is divided in different sections, depending on what solution do you choose. Regardless of your choice, all options share the problem analysis and the radio variable sharing.
1. Problem Analysis
To know the number of visitors, we need to find an action that they all perform when they come to our shop and we can somehow track.
We could achieve it in several ways. But let's assume we have a traditional shop with a standard door. Then, a good option is to register every time that the door is opened.
But, when does a client opens our door? We know that every time a customer gets into our shop opens the door. But the customer also needs to get out, or we would have a problem! It means that every customer will open the door twice. Hence, for our purposes, we will apply the rule that says: "Our total visitors equal the times the door was opened divided by two" or… visitors = (times the door is opened) / 2.
So, we now have a physical computing problem to solve: We want to create a system that detects when a door is opened (and closed), and then, keep track of it. At the end of the day, we want to know how many visitors we had.
2. Tracking the door's movements
Let's imagine how to detect when a door is open. Using the board's sensors our code can communicate with the "real" physical world. We can use the sensors in the micro:bit board in several ways. Some options are:
- The light sensor can be positioned in a way that it receives light when the door is open, but doesn't when the door is closed.
- The tilt sensor can track how many people get in and out if the board is attached to the door, because it can notice the acceleration when the door is being opened.
- The tilt sensor can also simulate a traditional bell hanging next to the door. If it is hit when the door is open, it would receive acceleration.
- The pins and an electric circuit, that is connected depending on the door’s position. When the door is open, the circuit isn't closed.
This time, we have chosen to use the light sensor.
3. Option A: Light Sensor
We will build a mechanism that will block the board's light sensors when the door is closed, but as soon as it is opened, it will receive light.
In order to do that, we need to understand the data that it receives. Sensors rarely give us a yes or a no, they work with numerical data. To understand the date we get from the board, let's work on a script to see what is going on.
The light sensors of a micro:bit board are in its LED display. We want to know the different values it gets when it is covered with a cardboard, and when it isn't and receives light. And track it every 500ms.
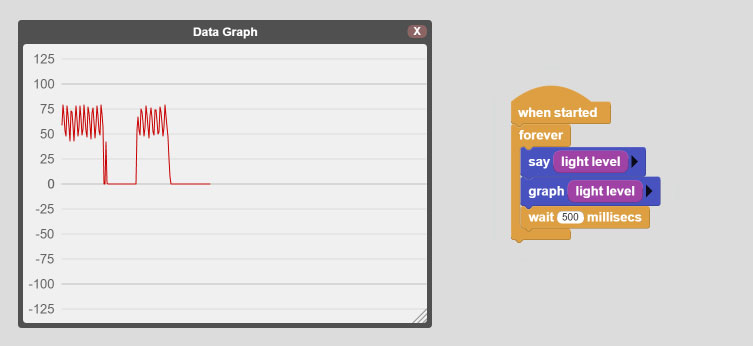
As we can see in the screenshot, when it receives light the value aproximately oscillates from 50 to 75. And when it's covered with a cardboard, the value gets down to 0. We could consider then, that if the sensor returns a value higher of 5, the sensor is receiving light. These values though, work for the specific conditions of the room in where we experimented. Light conditions surely change from place to place, and you will have to test yours.
Well, how will the program work then?
In the initial state, the board is covered by the cardboard and doesn't receive any light at all. Then, when the light sensor registers a value of 5 or more, we want to increase the value of a counter. For that, we created a variable called doorOpenings. This variable will start at 0, and will increase by 1 every time that the door is opened.
This will register when the door has been opened. But we also want to pause the tracking system until it gets closed again, otherwise our program would keep increasing the number of the doorOpenings variable. So, we will pause it until the light sensor receives a value of 0 again.
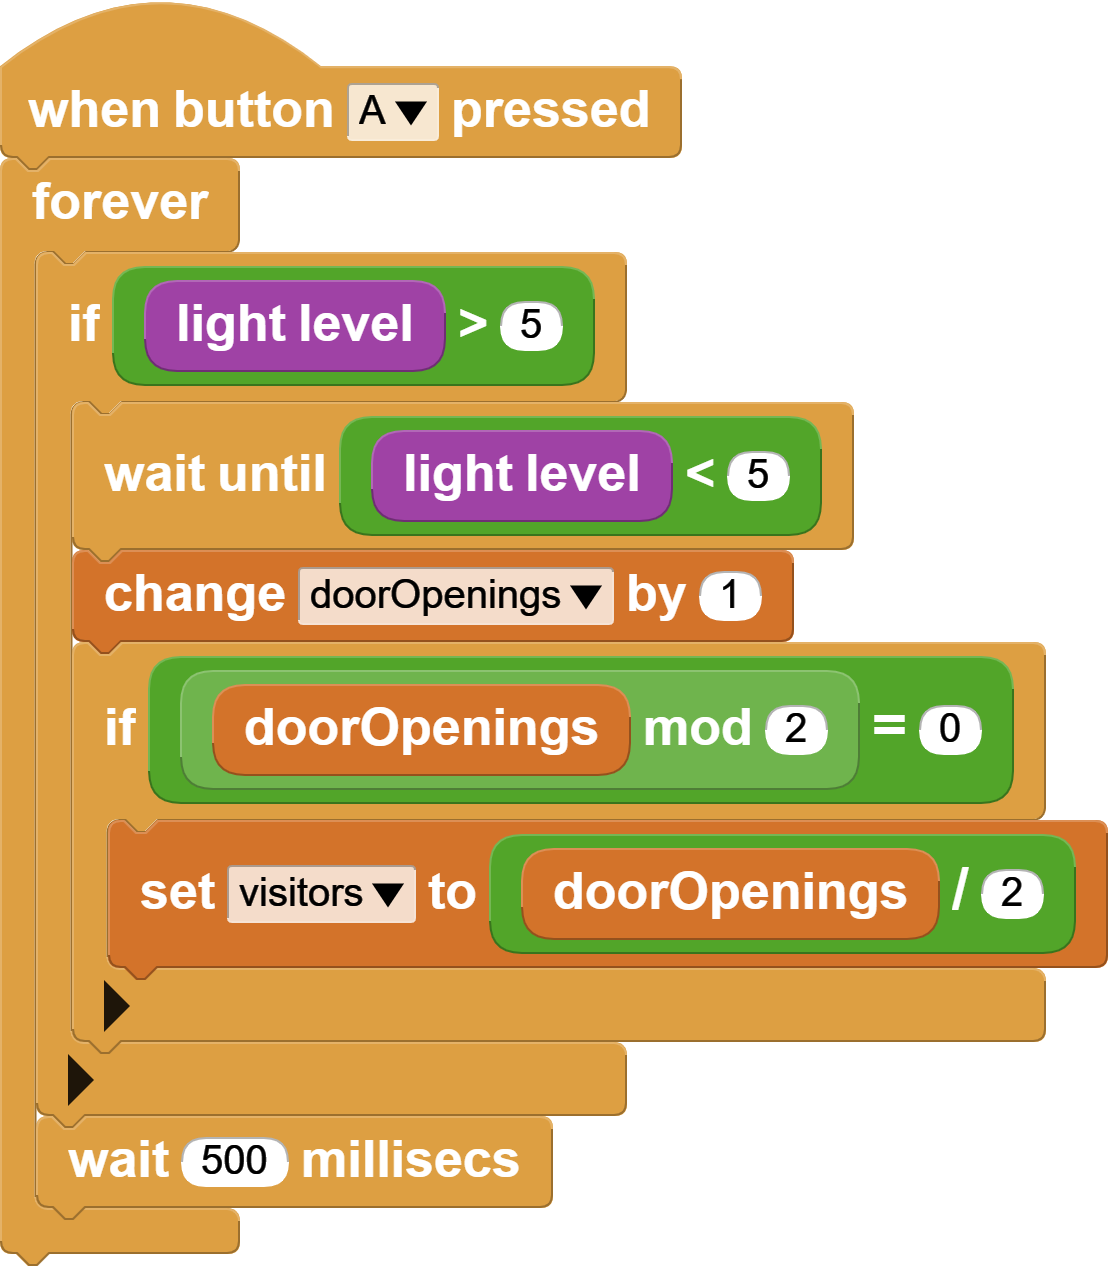
We built it like this:
![]()
In the screenshot above, we added a couple of things to understand the performance of our program:
The first block is the main program. In it, we built a forever loop that checks the light value every 500ms. When it detects that the light value is more than 5, it increases the value of the variable doorOpenings by 1. The variable is shown in the LED screen. And then, the script holds on the process until the light level gets under 5 again. When that happens, the "open and close" process is over and the board keeps tracking the light again.
Besides the main script, we are using the Data Graph to visually understand the light values' oscillation. And a helper program that says the value.
To finally know the number of visitors we just have to divide it by two. For that, we created a new variable called visitors. But, as we have seen before, we can't count a new visitor until the door is opened twice, so we will use a condition to check if the remainder is zero. If so, a new visitor will have left the shop, otherwise we would track half visitors!
Our final program looks like this:
We are done with the main functionality now! But our board showing the amount of visitors is covered by cardboard, and we can't see it. We will sort this out by sending the data to another board.
4. Sending Radio Data
Since some of our options for creating a visitors tracker require that the main board remains covered or can't be seen, or just for fun… We want to show our results in a different board.
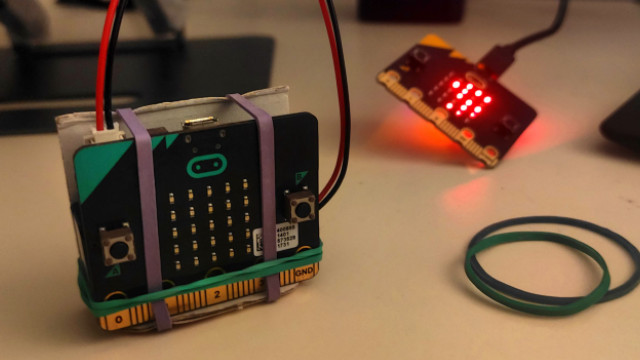
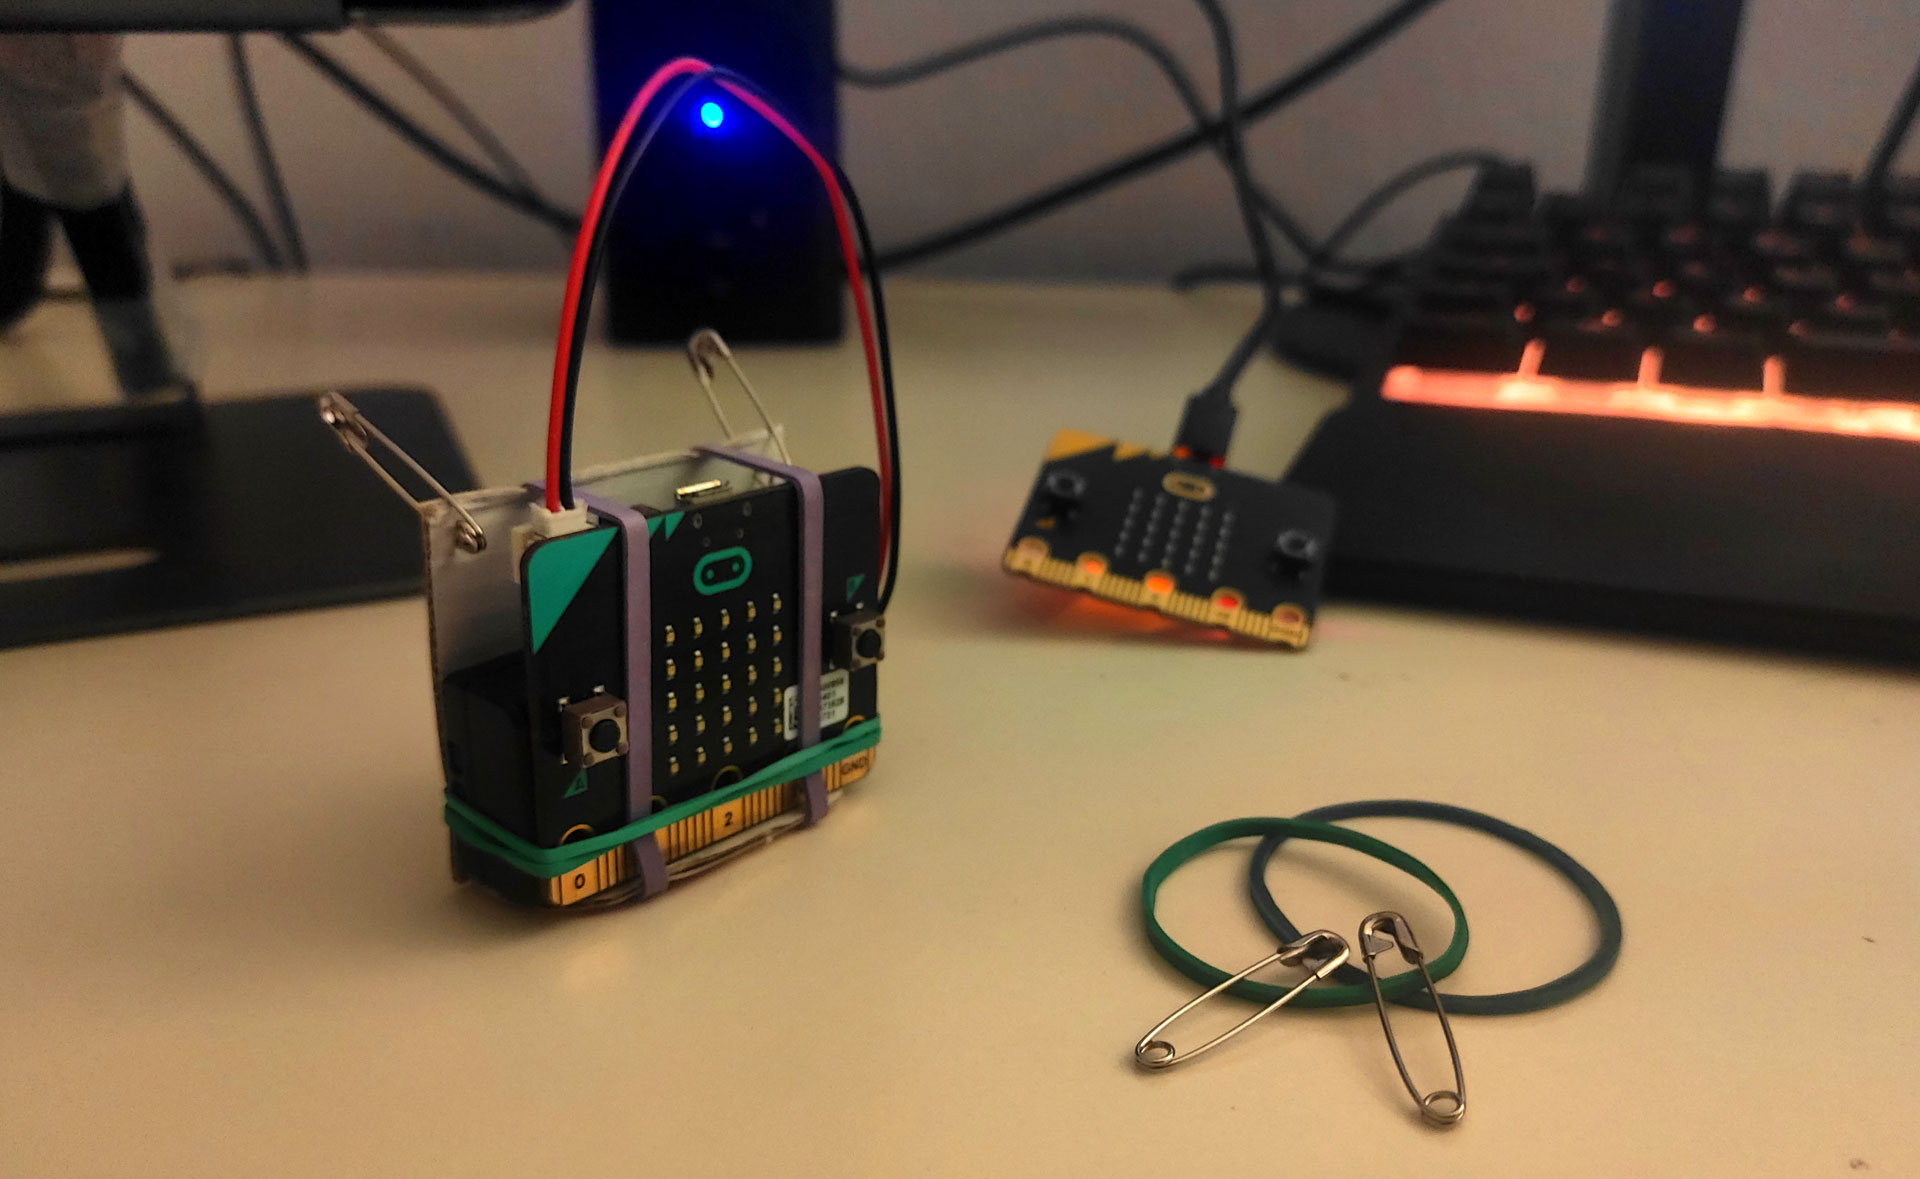
To do this, we will obviously need another micro:bit board. The one tracking the door openings will send radio data, and the extra one, will receive this data and show it in its LED display. To achieve it, we have to load the Radio library to use its functionalities.
To make this a bit funnier, we will not just show the total amount of visitors. We will also show an icon when the door is open.
We will essentially send numbers (although we could also send a text string). Makes sense to think that we will send the number stored in the variable visitors. Its value will surely be a whole number, starting at zero visitors. So, how could we send a special message to tell the door is open? We could send a number that we are sure that will never be stored in the variable visitors. A safe number. So, if the visitors variable stores natural numbers… Any negative number would do! And we have chosen -1.
We know what to do: When the door is open, the board will broadcast a -1, and when it is closed again, it will send over the number stored in visitors.
This addition to our main script for the light based tracker, leaves us with:
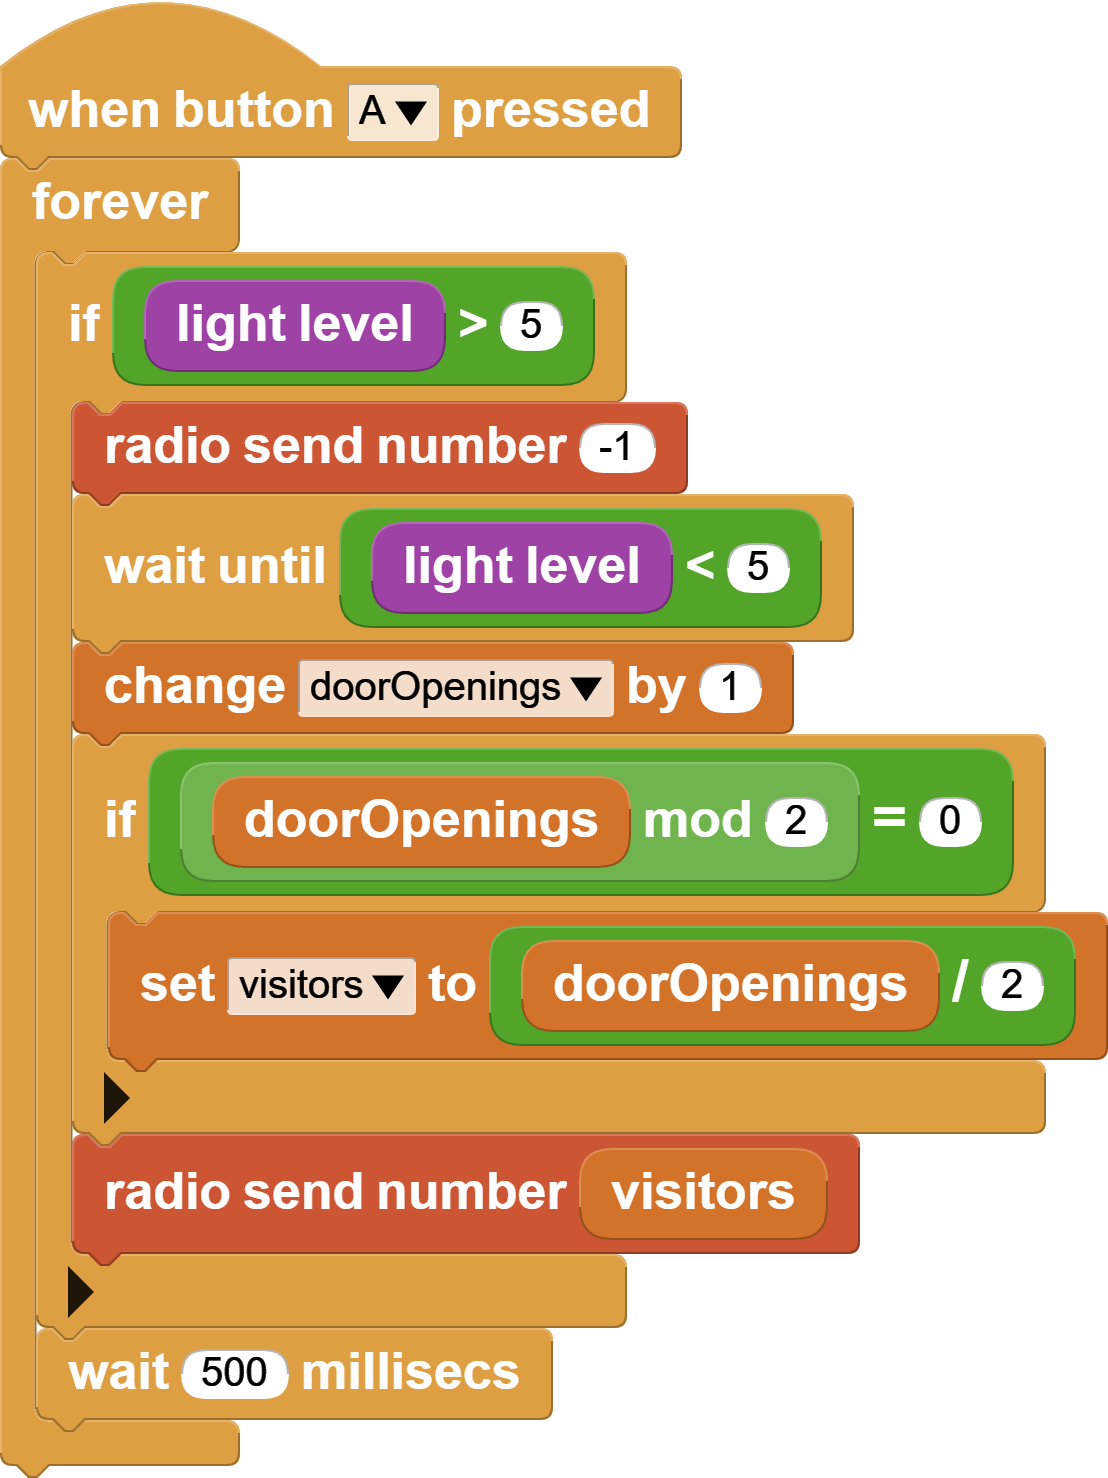
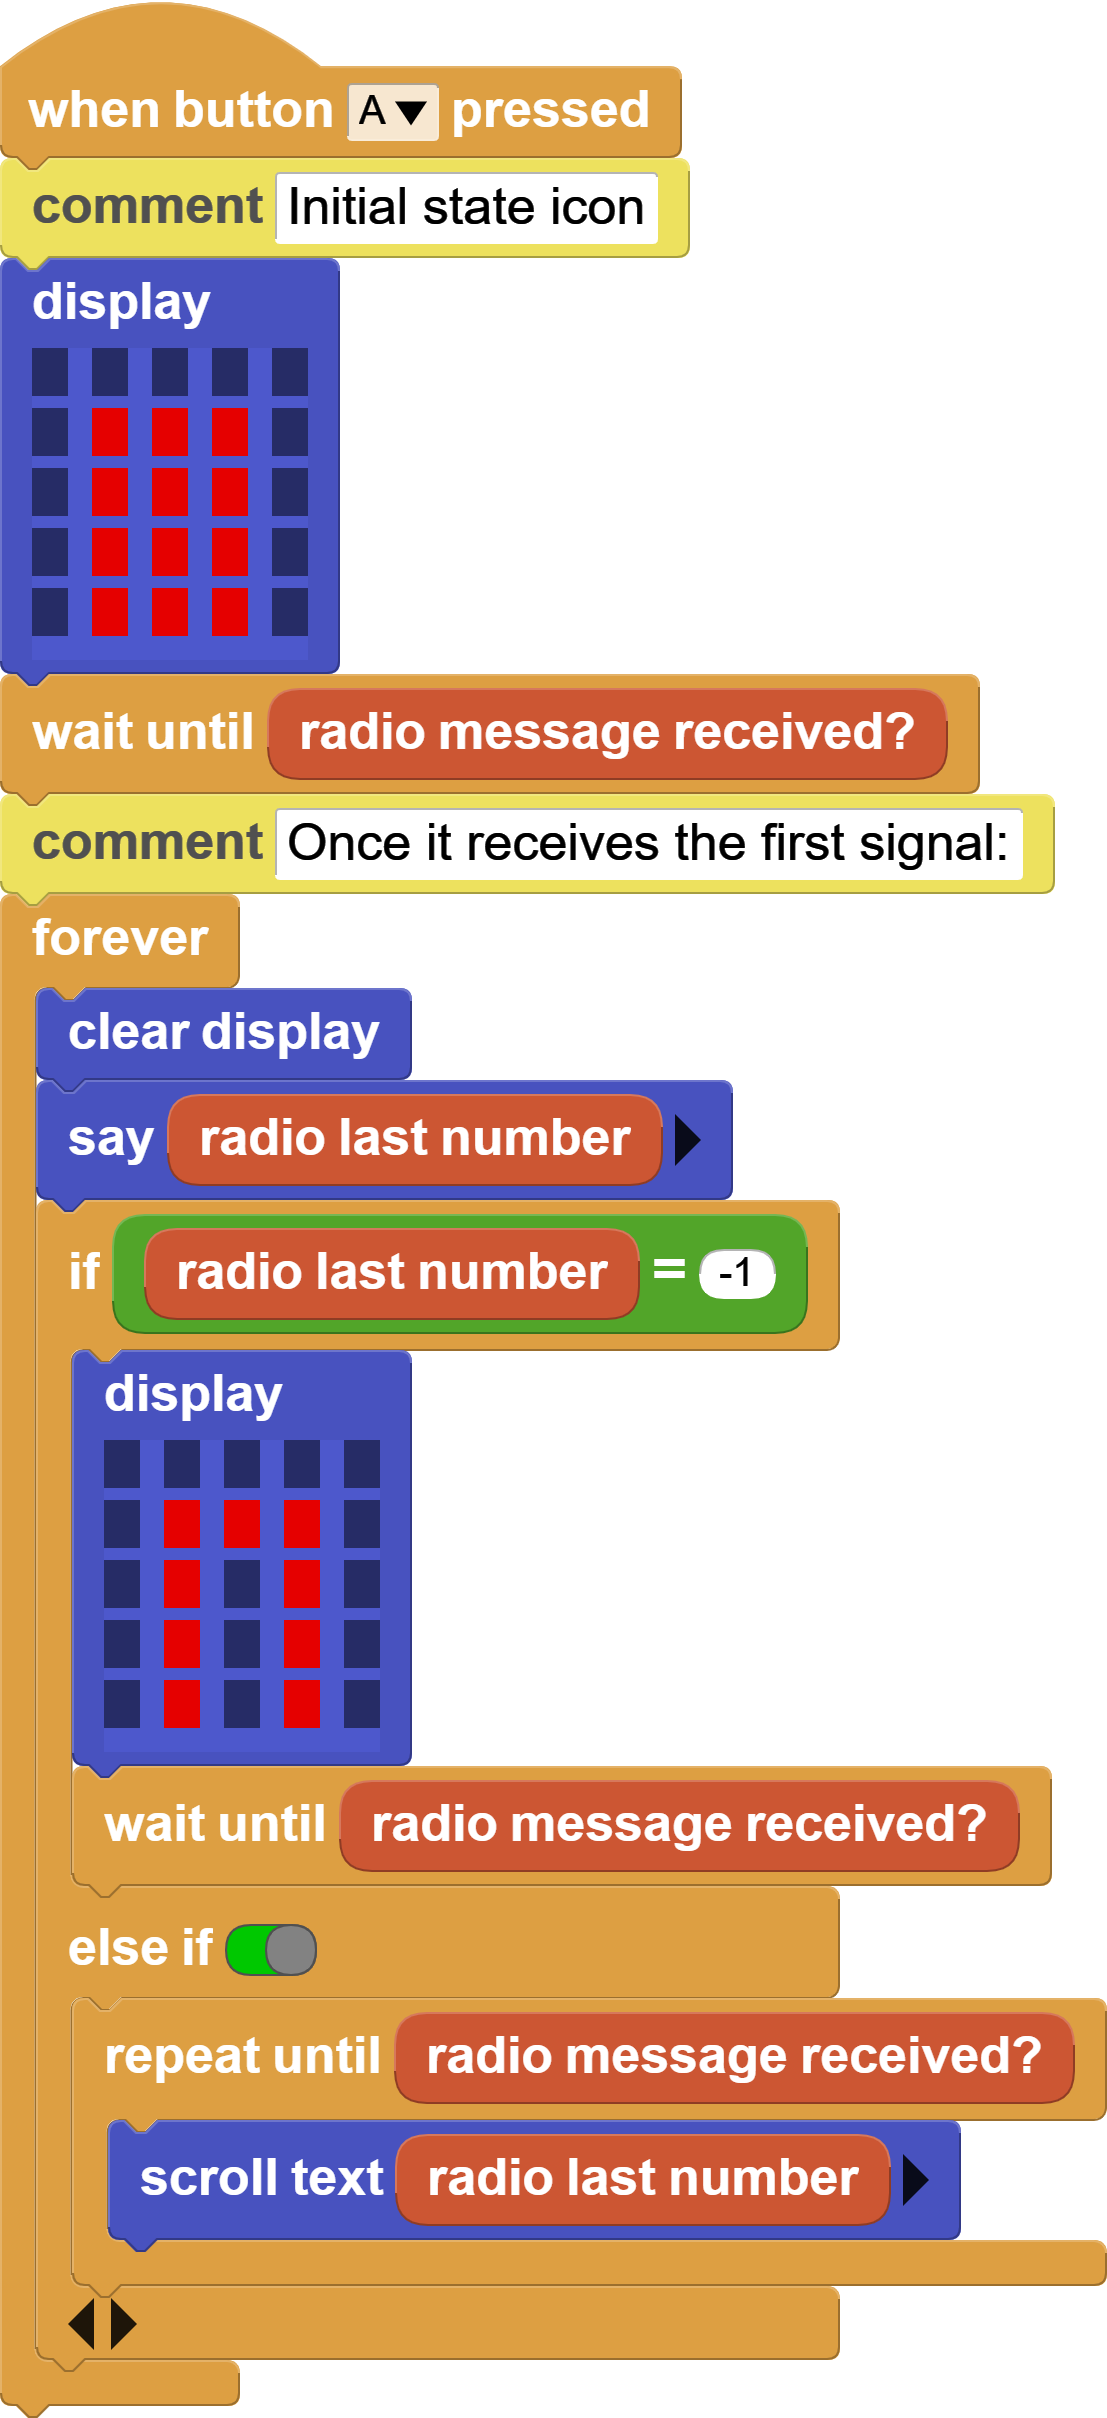
We are now broadcasting the amount of visitors, and even when the door is opened. It's time to take care of the board receiving the data and announcing it live in the LED display.
We want to create a script that is constantly aware of the radio data received. When it receives new data, it should show it in the LED display, and hold on until new data is received. MicroBlocks provides a very useful block called wait until, that suits us very well.
In addition to the wait until block, the Radio library provides another handy block: radio message received?. Putting them together, feels like MicroBlocks speaks our language… Hey board, wait until a radio message is received.
And we have to take in consideration the initial state too, right before our tracking board didn't send any data.
So:
- We wait until we receive the first data.
- When we receive our data, we check if it is:
A.-1, representing a closed door.
B. A whole number, representing the number of visitors. - We show what something on the screen and hold everything on until new data is received.
It looks like this: