
Overview
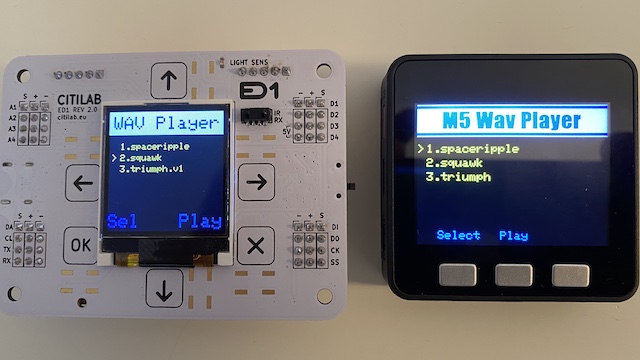
In this activity you will develop a program to play (uncompressed) WAV files on an M5Stack or ED1, complete with with a graphical user interface for selecting the file to be played.
WAV files (Waveform Audio) store digital audio in a form that is easy to extract and play -- as long as the data is not compressed.
Playing a WAV file requires a board with:
- a file system to hold the WAV files and
- a digital to analog converter (DAC) for digital audio output
Boards based on the ESP32 chip have both of those things. In addition, both the M5 Stack and ED1 have color displays that can be used to provide a user interface.
User Interface Design
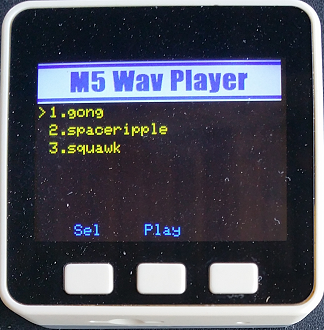
Here's the plan for the user interface:
Up to six WAV files can be displayed on the screen. The user will select a file using the Sel butten then press Play to play it.
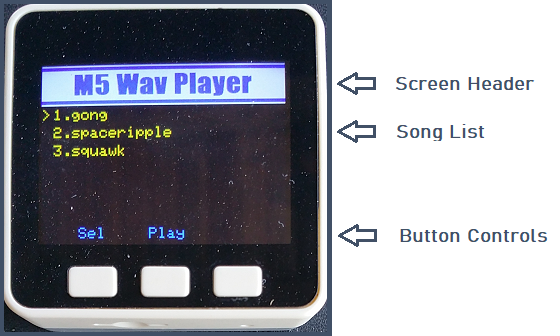
Screen Header
We'll use a bitmap create with a paint program as the header for the M5Stack. The M5 display is 320x240 pixels so the header image is the same width: 320x55 pixels.

Song List
The middle of the display will list the names of the WAV files that can be played. There is only room on the screen for six file names.
The program will draw a " > " character to the left of the song to be played.

Button Controls
The program will be controlled by two buttons.
- Button A (left button): Select the file to be played.
- Button B (middle button): Play the selected file.
When button A is pressed, the selection cursor will move one line down, to the next file name. After the last line, it will wrap back to the first line.
When button B is pressed, the selected file will play.
The UI will draw labels above the buttons to indicate their functions.
Process
Put Files onto the Flash Storage
The first step is to transfer the header image BMP file and several WAV files to the ESP32's flash file system. The necessary files are in the downloadable file package at the end of this activity.
Enable the show advanced blocks feature under the settings icon.
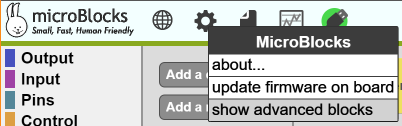
This makes the put file and get file commands available in the file menu.
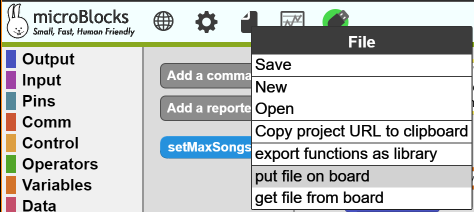
When you click on the put file on board, a system file select dialog will appear. Navigate to the directory where the WAV and the header image files are stored and put these files on the ESP32 board:
- M5WavPlayer_Header.bmp
- spaceripple.wav
- squawk.wav
- triumph.wav
We have provided three short WAV files for testing. Later, you can add your own WAV files.
Add Libraries
The code uses the following MicroBlocks libraries:
- BMP (Graphics): The display BMP file block displays the UI header image.
- TFT (Graphics): The write and clear blocks display and clear text on the screen.
- Files (Other): The file names lists the files stored on ESP32 board.
- WAV (Sound): The play block will play the selected song.
To load these libraries, click on the + button to the right of Libraries, open the appropriate library folder (e.g. Graphics), and then select the library to load.
Collecting WAV files
Begin by defining a custom block to scan the file system and extract the names of the WAV files.
Create two variables named songs and maxSongs. songs will store the list of WAV files and maxSongs will store the number of files.
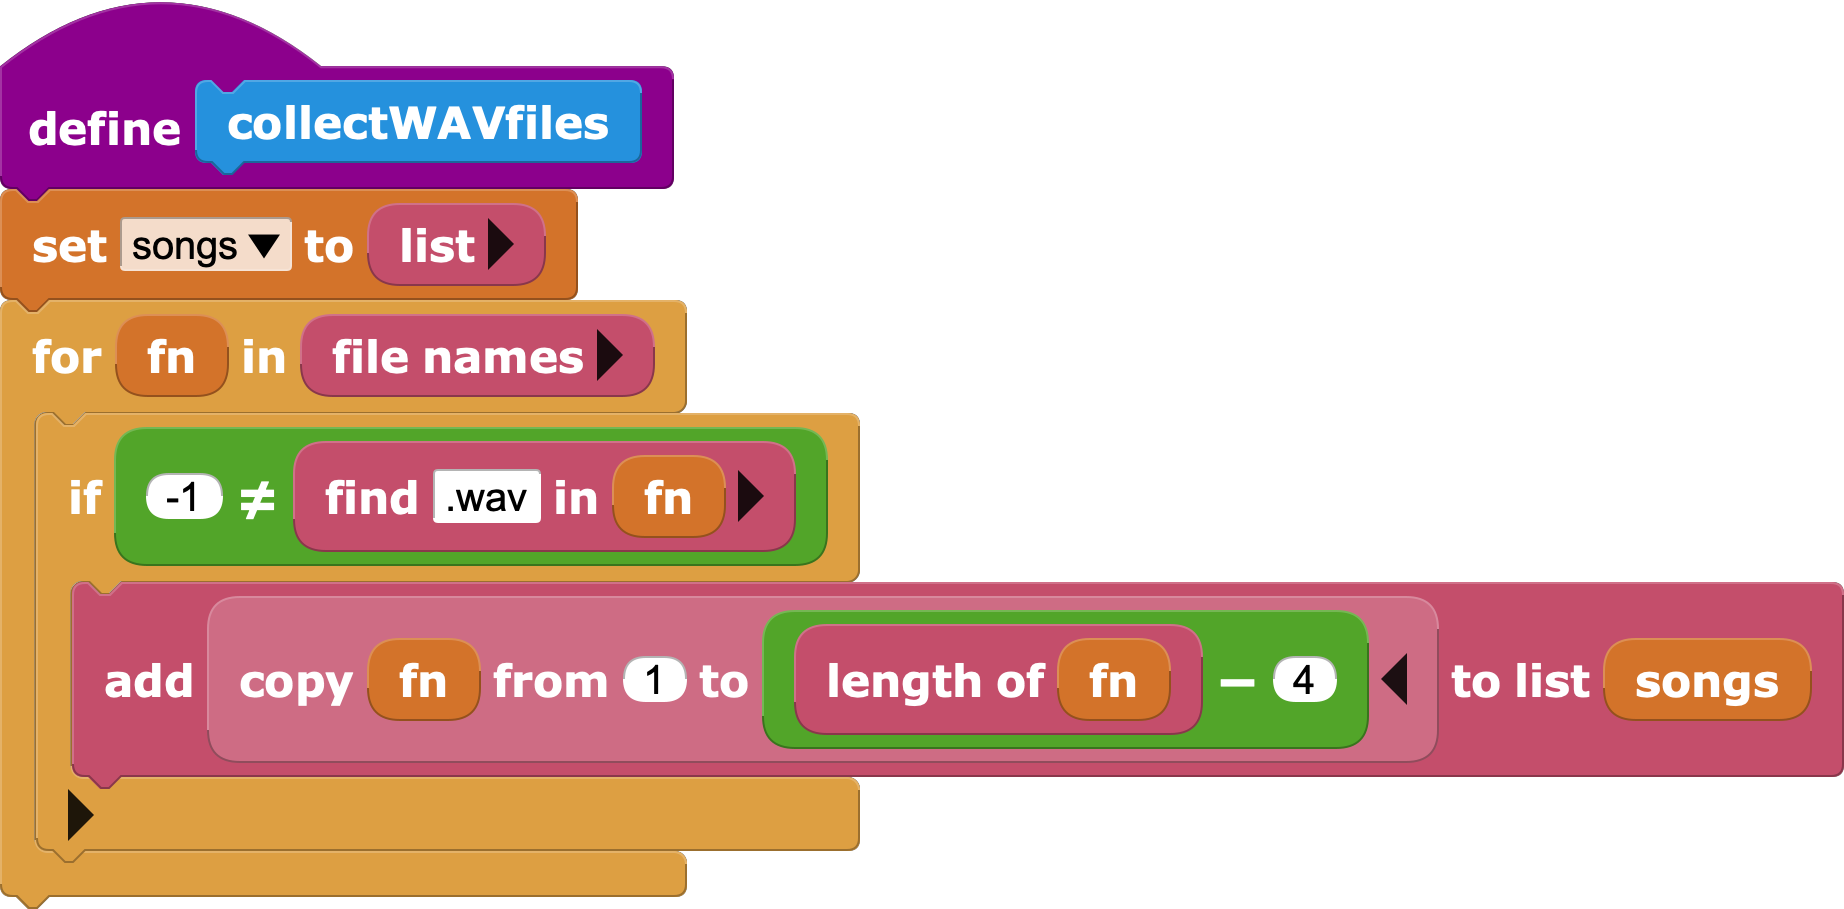
Select My Blocks and add a command block named collectWAVfiles. This block will gather WAV files into the songs list.
How will we collect the WAV files? The file names block from the Files library lists all available files, but there may be a mixture of WAV and other files.
To select just the WAV files, use the find block to detect the file extension ".wav" in the file name.

To make the song names more readable in the UI, remove the ".wav" file extension by copying the file name without the final four characters.
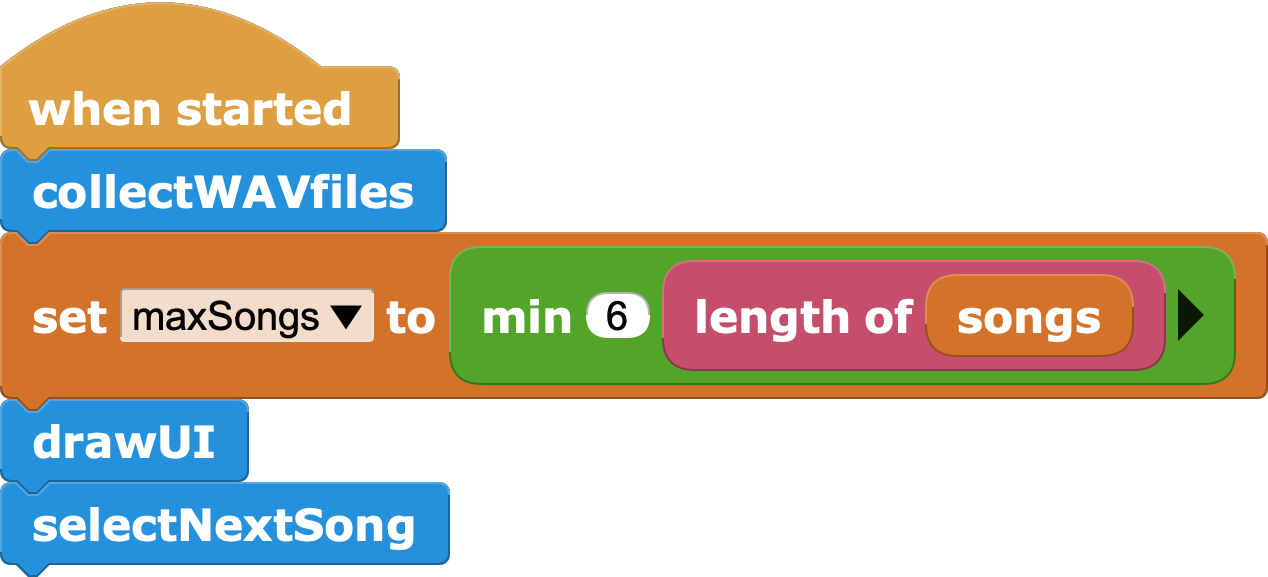
Use this block to write the first part of the *when started script.
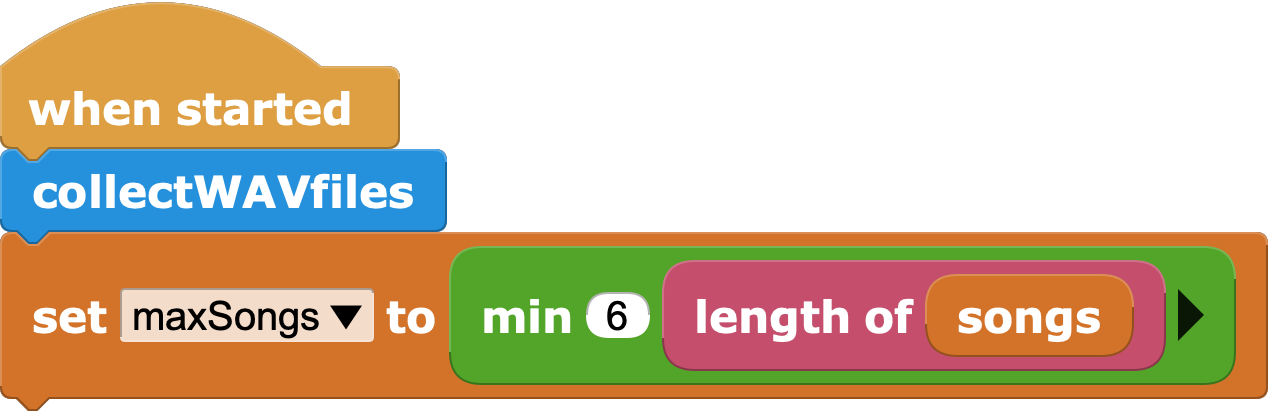
Since there is room for only six song names in the UI, the min block is used to limit maxSongs to no more than six.
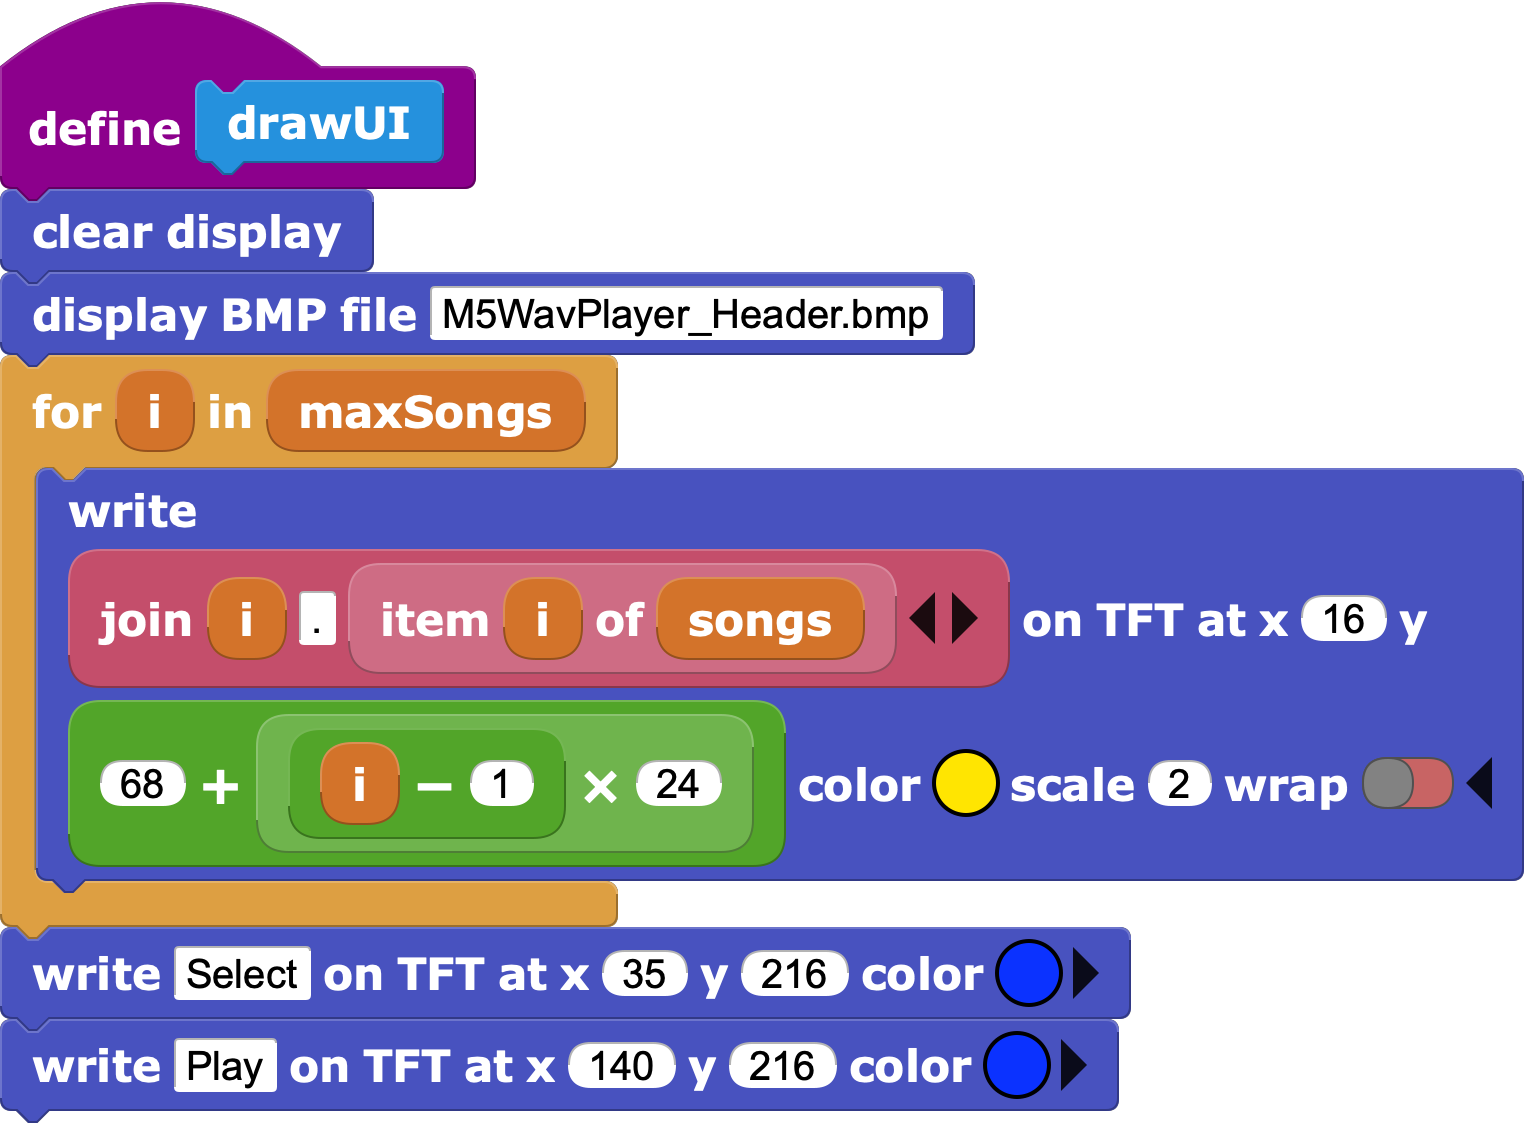
Drawing the UI
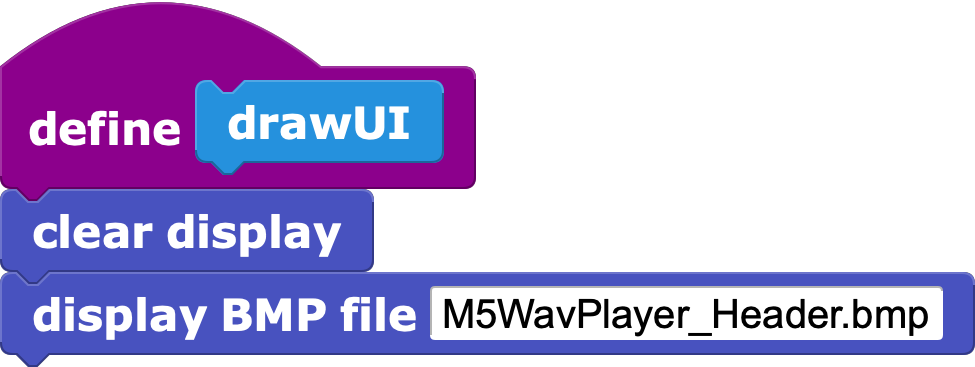
The next step is to define a block to draw the user interface. Start by clearing the display and drawing the header.
Draw the names of the WAV files from the songs list, with a number in front of each one.
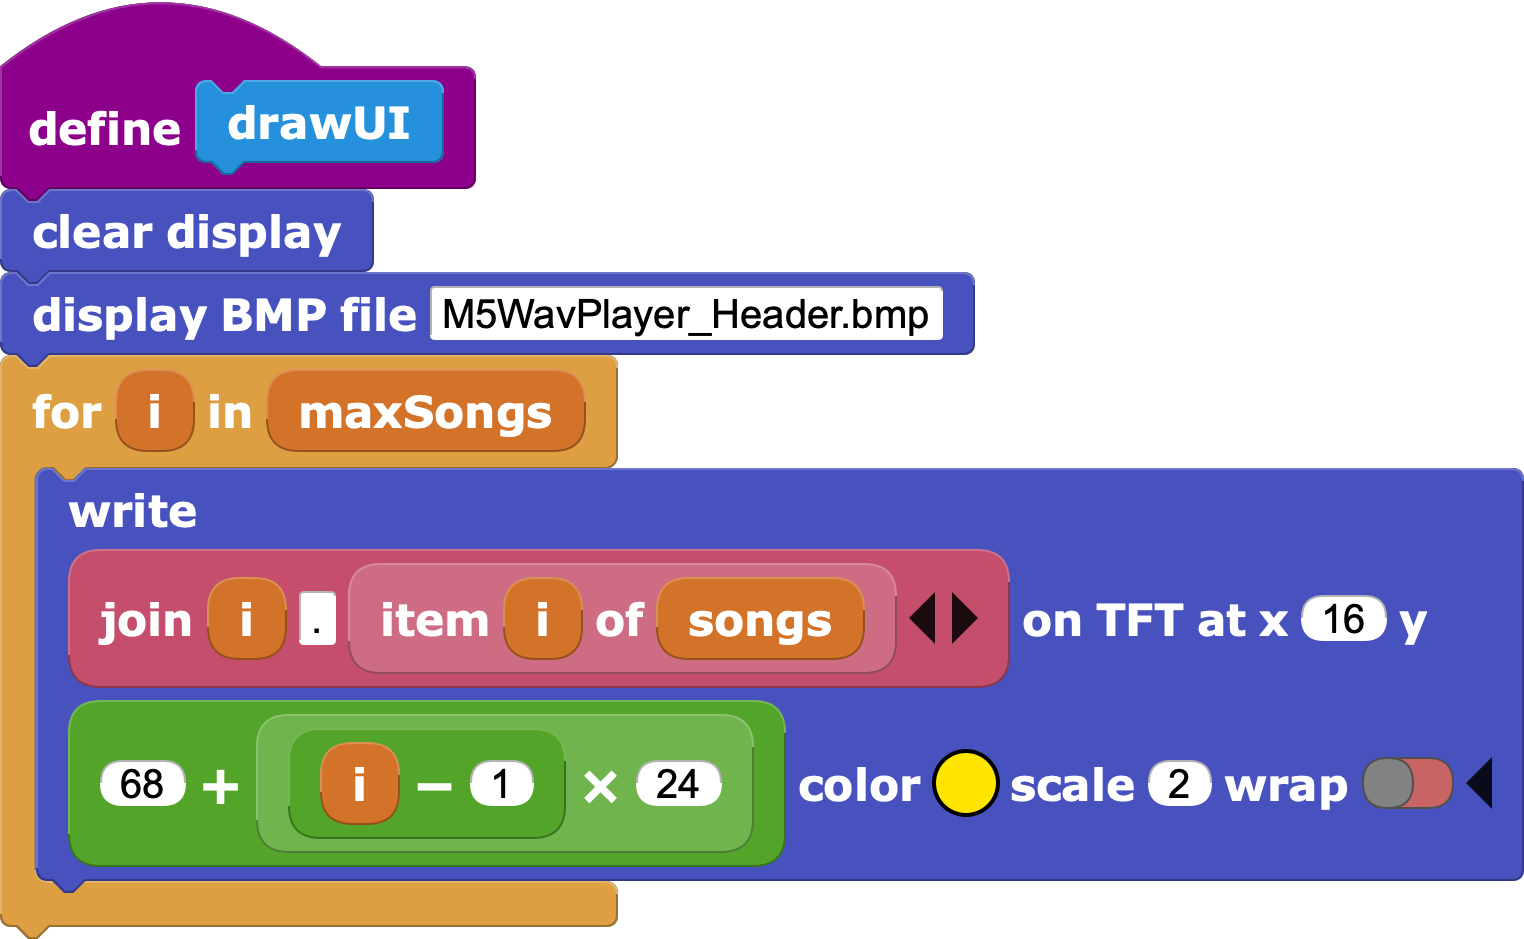
Finally, draw labels for the two buttons.
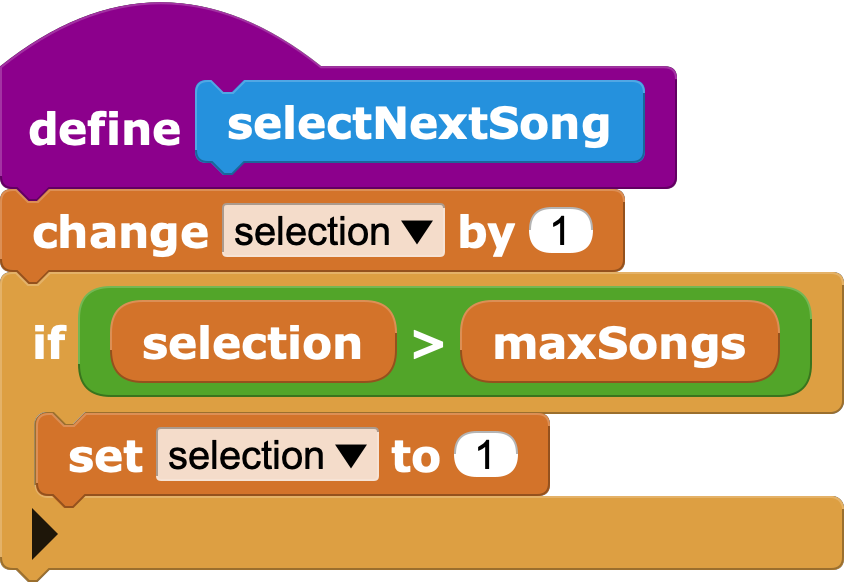
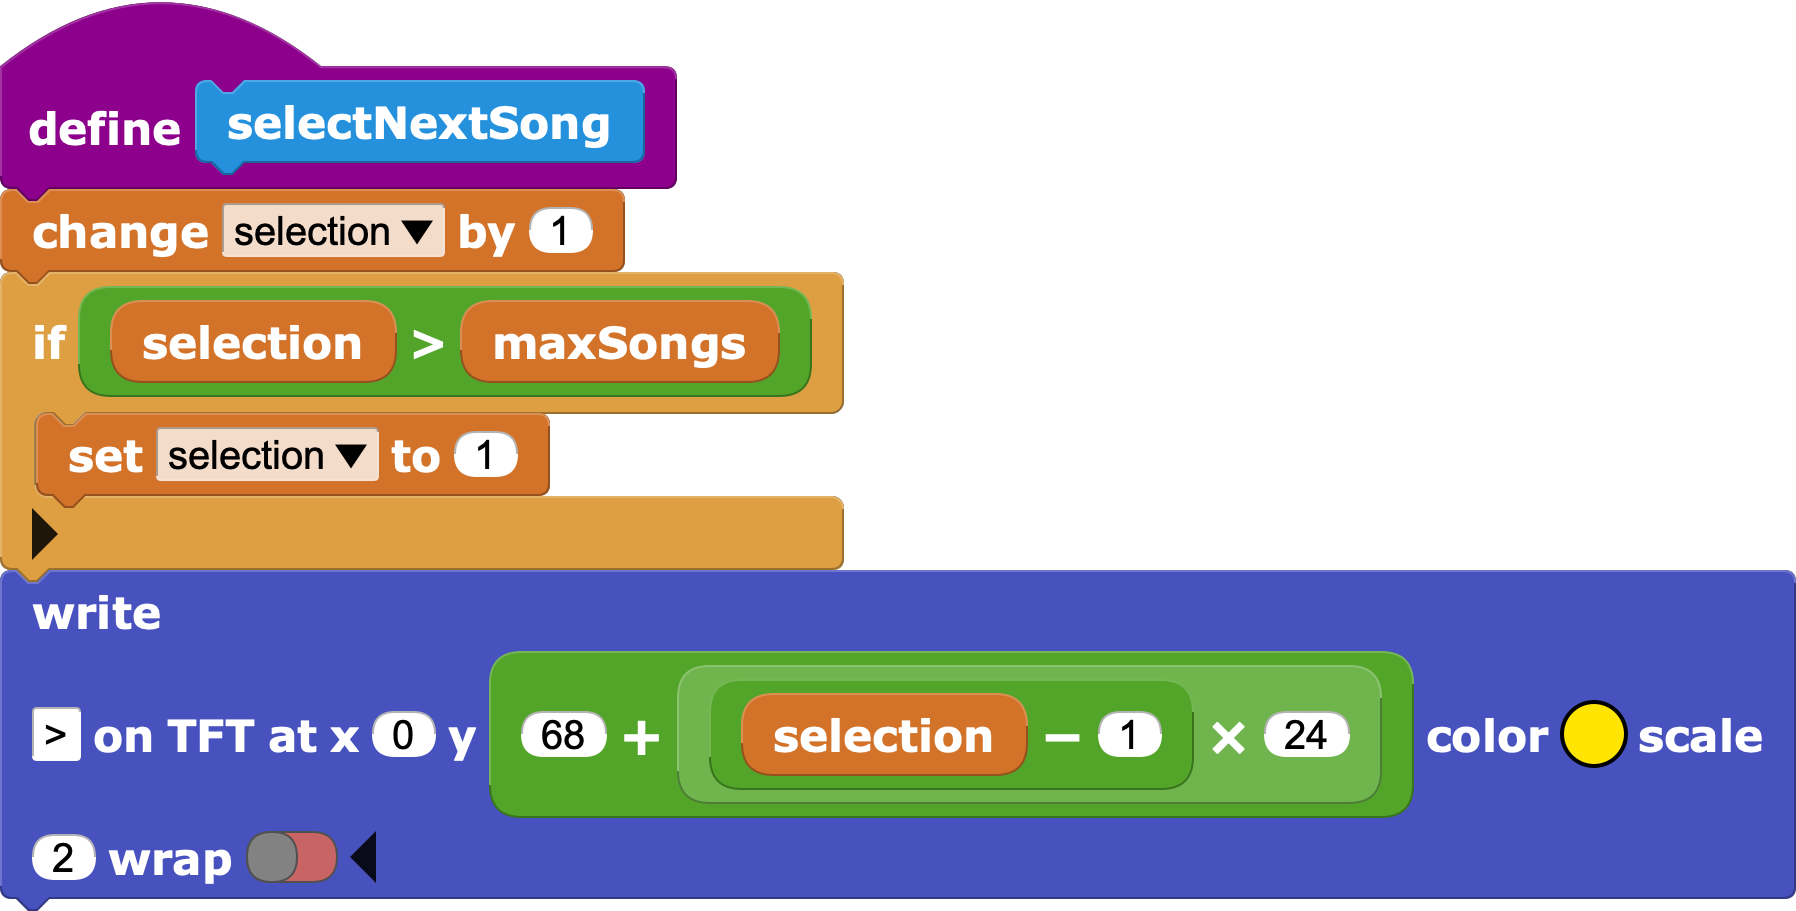
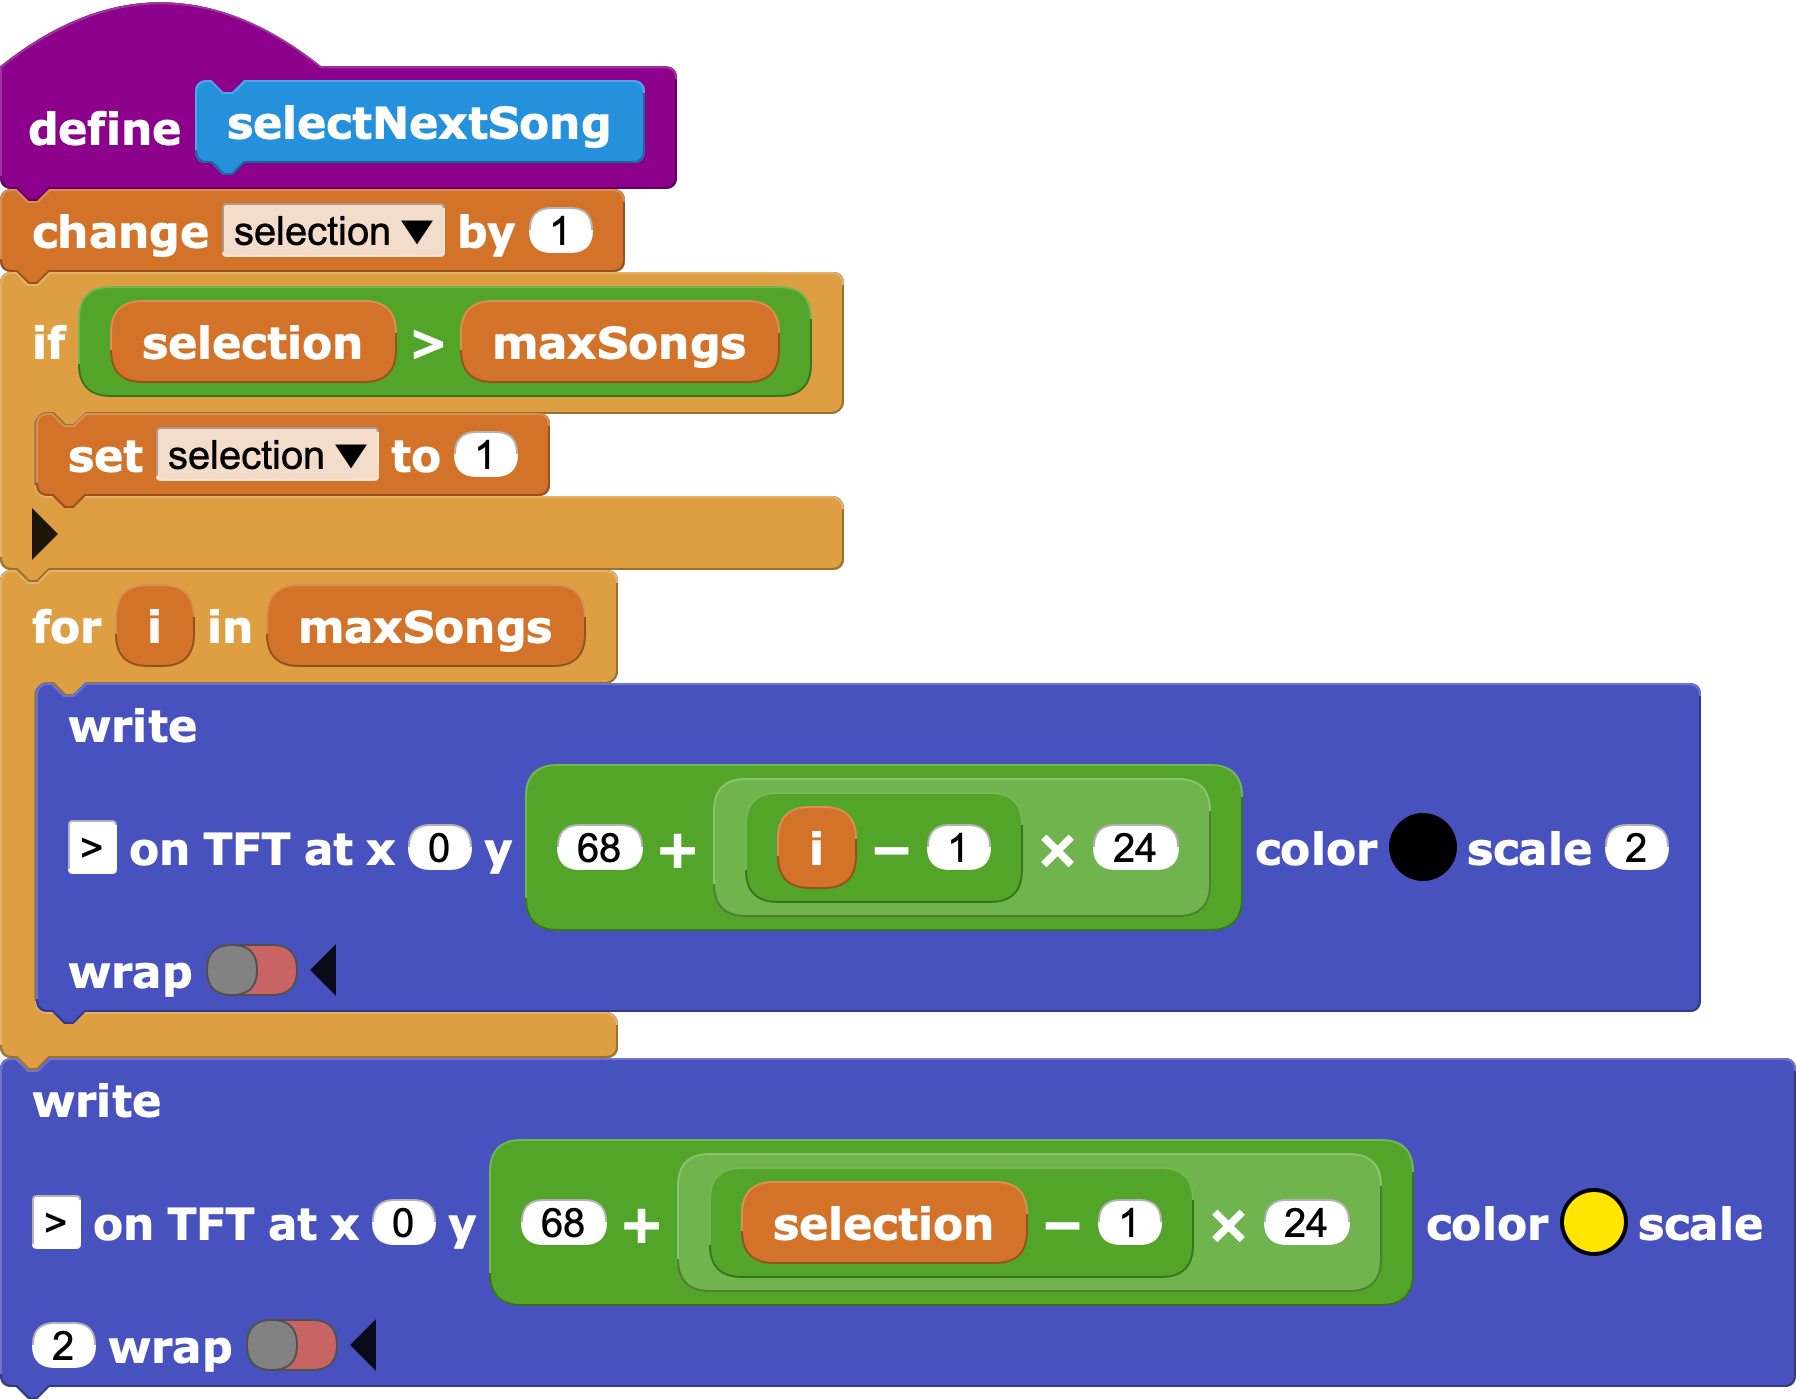
Selecting a file to play
The next step is to define a block to select a song to be played and to display the selection in the UI.
The first part is easy. Add a variable named selection. Increment that variable when the Select button is pressed, and go back to the the first file when selection is greater than maxSongs.
Indicate the selected song by drawing a > character next to it.
But wait! The code must also clear the previous selection. Drawing the > character in black will erase it.
Update the startup script to draw the UI and select the first song.
Button Controls
The Play button is easy.
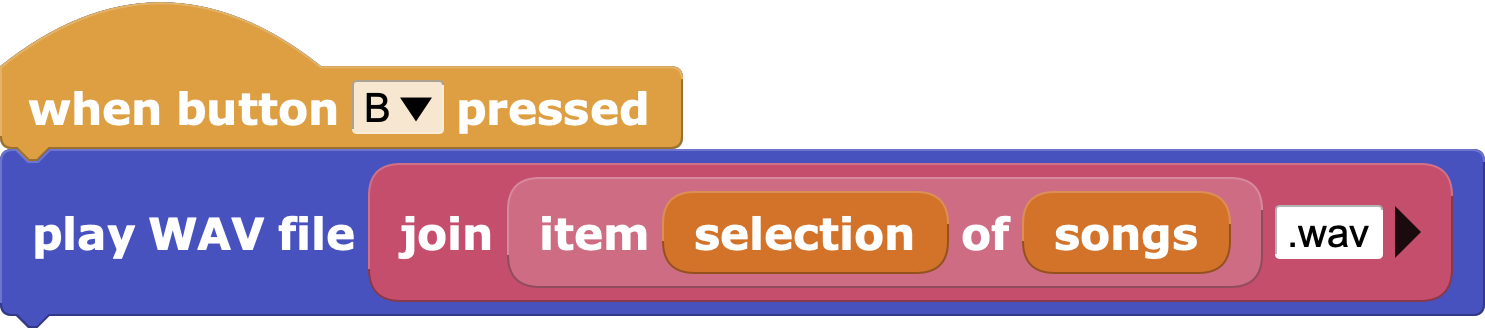
Use join to append .wav to the file name before playing the file.
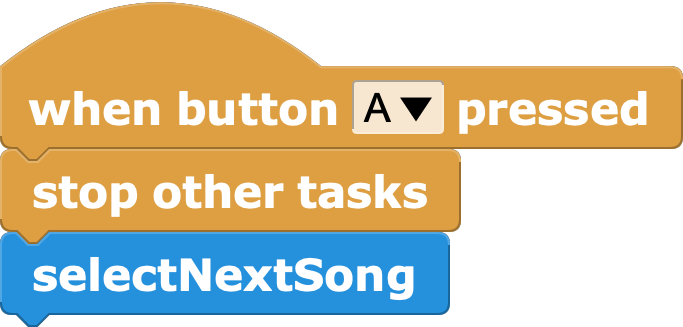
The Select button is also easy.

However, this implementation does not allow the user to start playing another file while the current file is still playing. The stop other tasks block will stop playback when a new song is selected.
Discussion
You will probably want to upload some WAV files of your own. Make sure that they are uncompressed WAV files (also called "Linear PCM"). The MicroBlocks WAV library can play uncompressed 8-bit or 16-bit, mono or stereo WAV files. However, since the ESP32 has only a single, 8-bit output channel, there's no benefit to using 16-bit or stereo WAV files; they don't improve sound quality and they take longer to transfer to the board.
Here are some additional enhancement or changes that you might consider:
- Use the sort block from the Lists library to sort the song list.
- Eliminate the six song limit of the program. Consider making the file list scrollable.
- Replace header image with one of your own design. Better yet, design a totally different user interface. For example, if your board has an accelerometer you might use the *tilt blocks to control the UI.
Download
This zip file contains the program, the image header file, and some sample WAV files. Download and unzip it to get the files.