
Connecting MicroBlocks to Snap!
Introduction to Snap!
In this activity we will learn how to create a video game with Snap!, a visual block programming environment similar to Scratch and MicroBlocks, which allows us to develop more complex projects.
The video game can be controlled using any MicroBlocks compatible board, either by connecting it via cable or, if the board allows it, wirelessly via Bluetooth BLE.
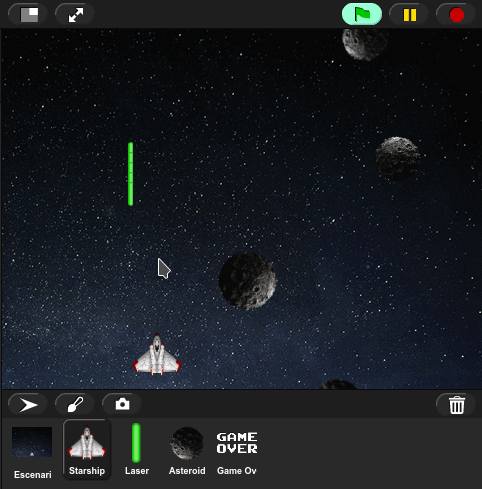
Movement of the ship
We have a template available with the objects already created at this link. You must use development version 10 or higher.
We will start by programming the movement of the ship. Since we only want to move it from left to right, we just need to modify the x component of its position using the
set x to _block in the Movement category.

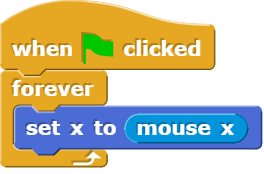
- One possibility is to use the mouse to move it. To do this, we need the
mouse xblock which is in the Sensors category.

Challenge 1: Make the ship always follow the mouse x when starting the game

Solution to challenge 1
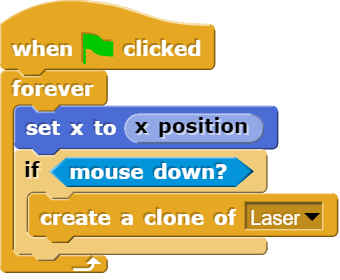
Shoot Laser (I)
To fire the laser we will create copies or clones of the Laser object. To do this we need to look for the
create a clone of _block that we have in Control category.Instead of "myself" (Starship) we must select the Laser object.

- We can do the shooting action when we click the mouse, so we will have to look for the block corresponding to Sensors and use a conditional to execute the action.
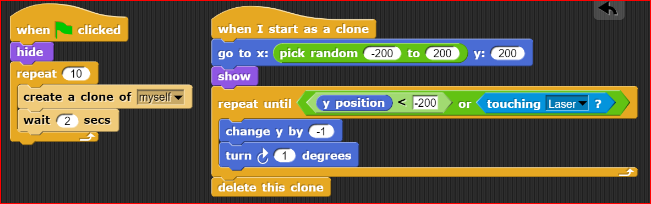
Shoot Laser (II)
To create copies of the Laser we will first select it and look for the block
when I start as a clonein Control category. You must select the laser object to apply this code.Once the copy is created, we will make it go to the ship and also point in the same direction as it.
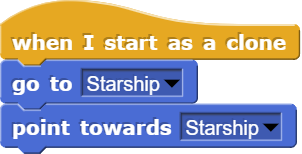
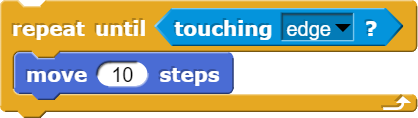
- Finally, we will make it move until it touches the edge, where we will also delete it.
Challenge 2: Make the ship always follow the mouse x when starting the game
Solution to challenge 2
Asteroid movement (I)
With the asteroids we will do the same, we will create copies that fall from top to bottom.
To do this, we will run the
create clone of _block every 2 seconds (for example) from the start.

- Once the copy is created, we'll make it go to a point on the top edge with a random x. For this we will need the pick the
random _ to _block that we have in Operators cagegory.

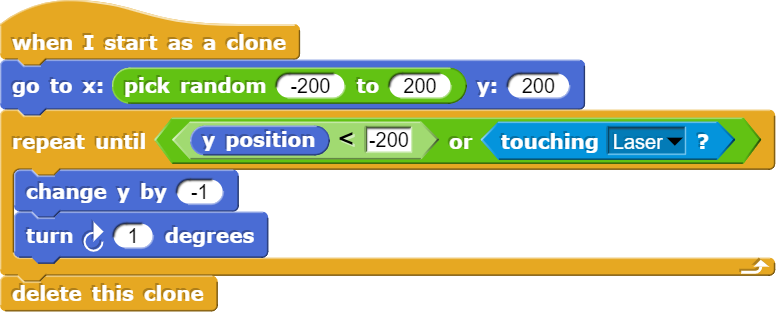
Asteroid movement (II)
Once the copy of the asteroid is located, we will make it move down by subtracting 1 (or rather, adding -1) to its y using the
change y by _.In addition to falling, we can also make it rotate using the
turn _ degreesblock.To make the copy deleted when the Laser is touched or or when its y-position is lower than -200, you need to use a conditional with the
_ or _block.
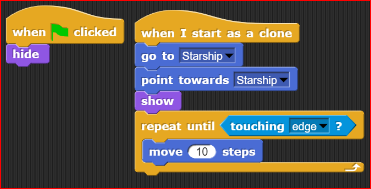
Challenge 3: Make the Asteroid object hide at startup and only show when the copy is created
Solution to challenge 3
End of game (I)
The idea is that the game ends once the ship collides with an asteroid.
Although this check can be done on either one object or the other, in this example we will do it on the ship.
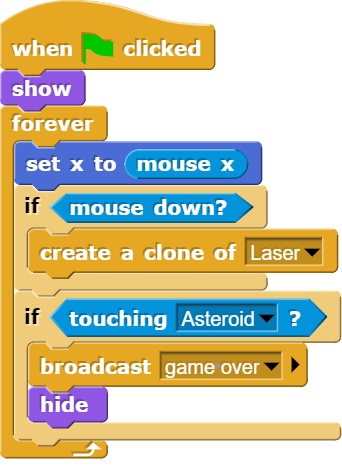
The only thing that needs to be done is that, in case of touching the Asteroid, send a "game over" message and also hide the ship (as if it had been destroyed).
Don't forget to make it show at the start, otherwise it will stay hidden!
End of game (II)
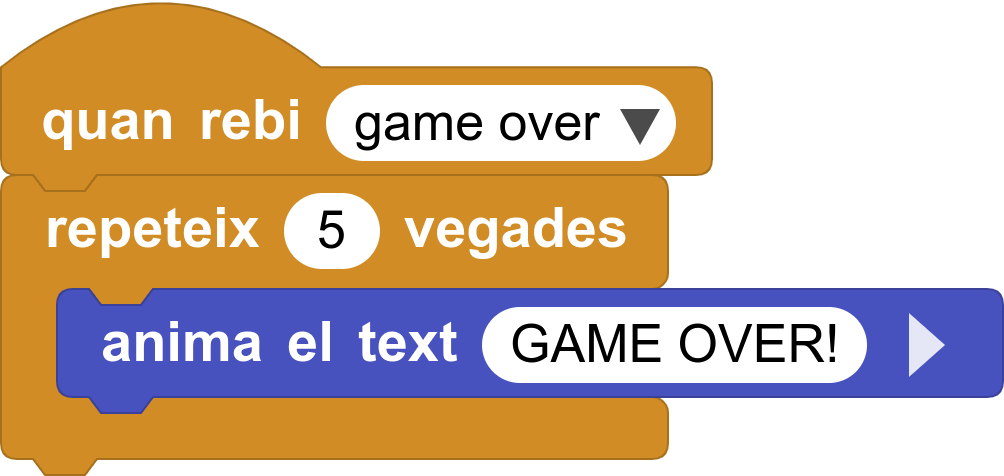
When the message is received we will make the Game Over object appear and stop the program using the
stop allblock.In addition, it will be necessary to hide the Game Over object at the beginning, since otherwise it will remain visible the whole time while we play!

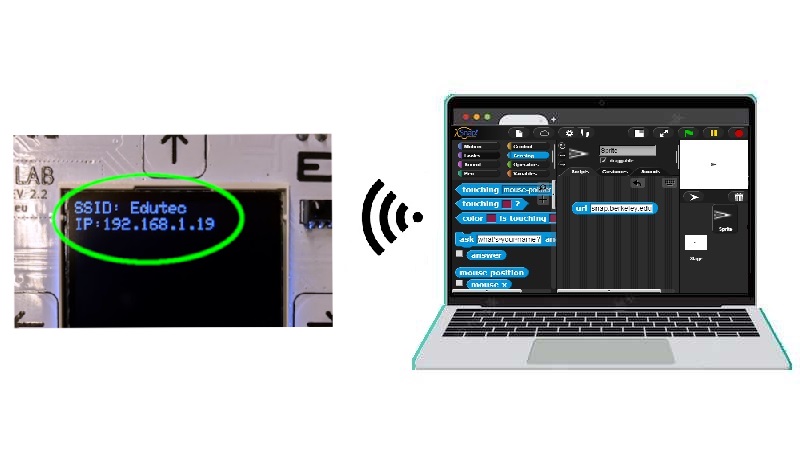
Connection between MicroBlocks and Snap!
The connection between MicroBlocks and Snap! can be established via cable or Bluetooth BLE (as long as the board and the computer or device where Snap! is running allow it).
Communication is done through message sending blocks. Messages and data can be exchanged in both directions, from MicroBlocks to Snap! and from Snap! to MicroBlocks.
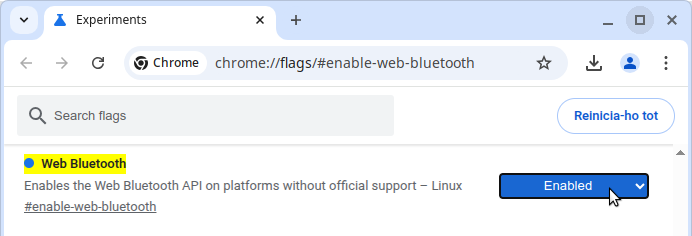
It only works in Chrome or compatible browsers. For Bluetooth BLE connection with Linux, the Web Bluetooth option of the browser must be enabled.
- In the case of MicroBlocks, no additional library is needed. However, in Snap! it is necessary to import the MicroBlocks library.
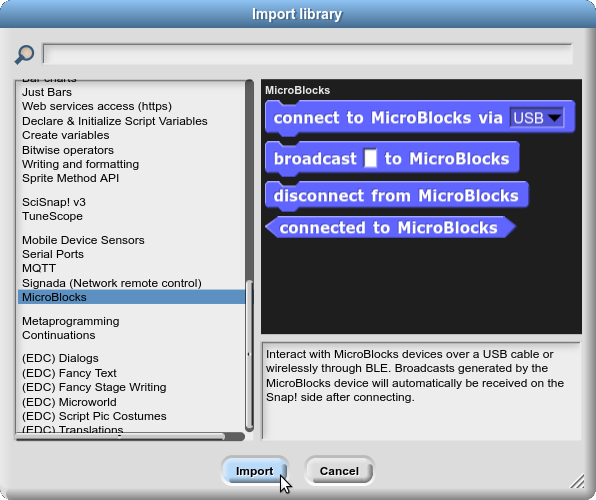
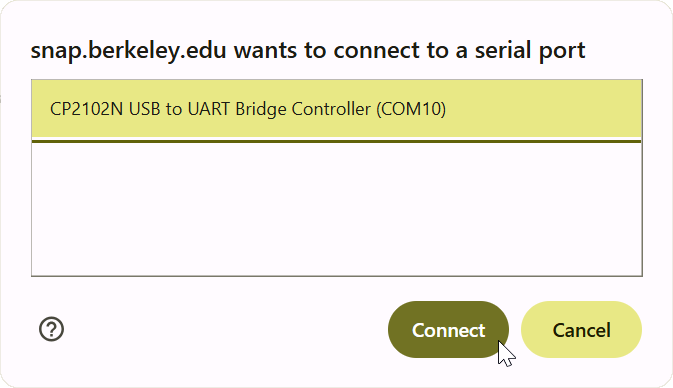
To establish communication, use the
connect to MicroBlocks via _block from the MicroBlocks category.In the USB version, Snap! and MicroBlocks are connected via USB cable. The program must be prepared in MicroBlocks and closed beforehand. When activating the block, a window appears to choose where our board is connected.

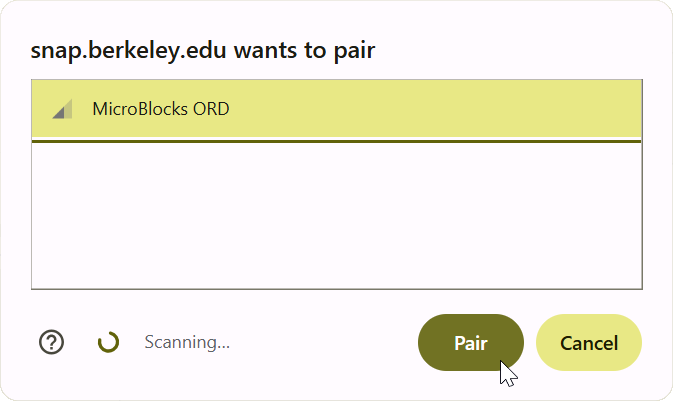
- With the BLE option, a window appears to choose the Bluetooth name of the board.

- To control the starship remotely with the ED1 board, the program must be prepared and executed in MicroBlocks beforehand.
From MicroBlocks to Snap!
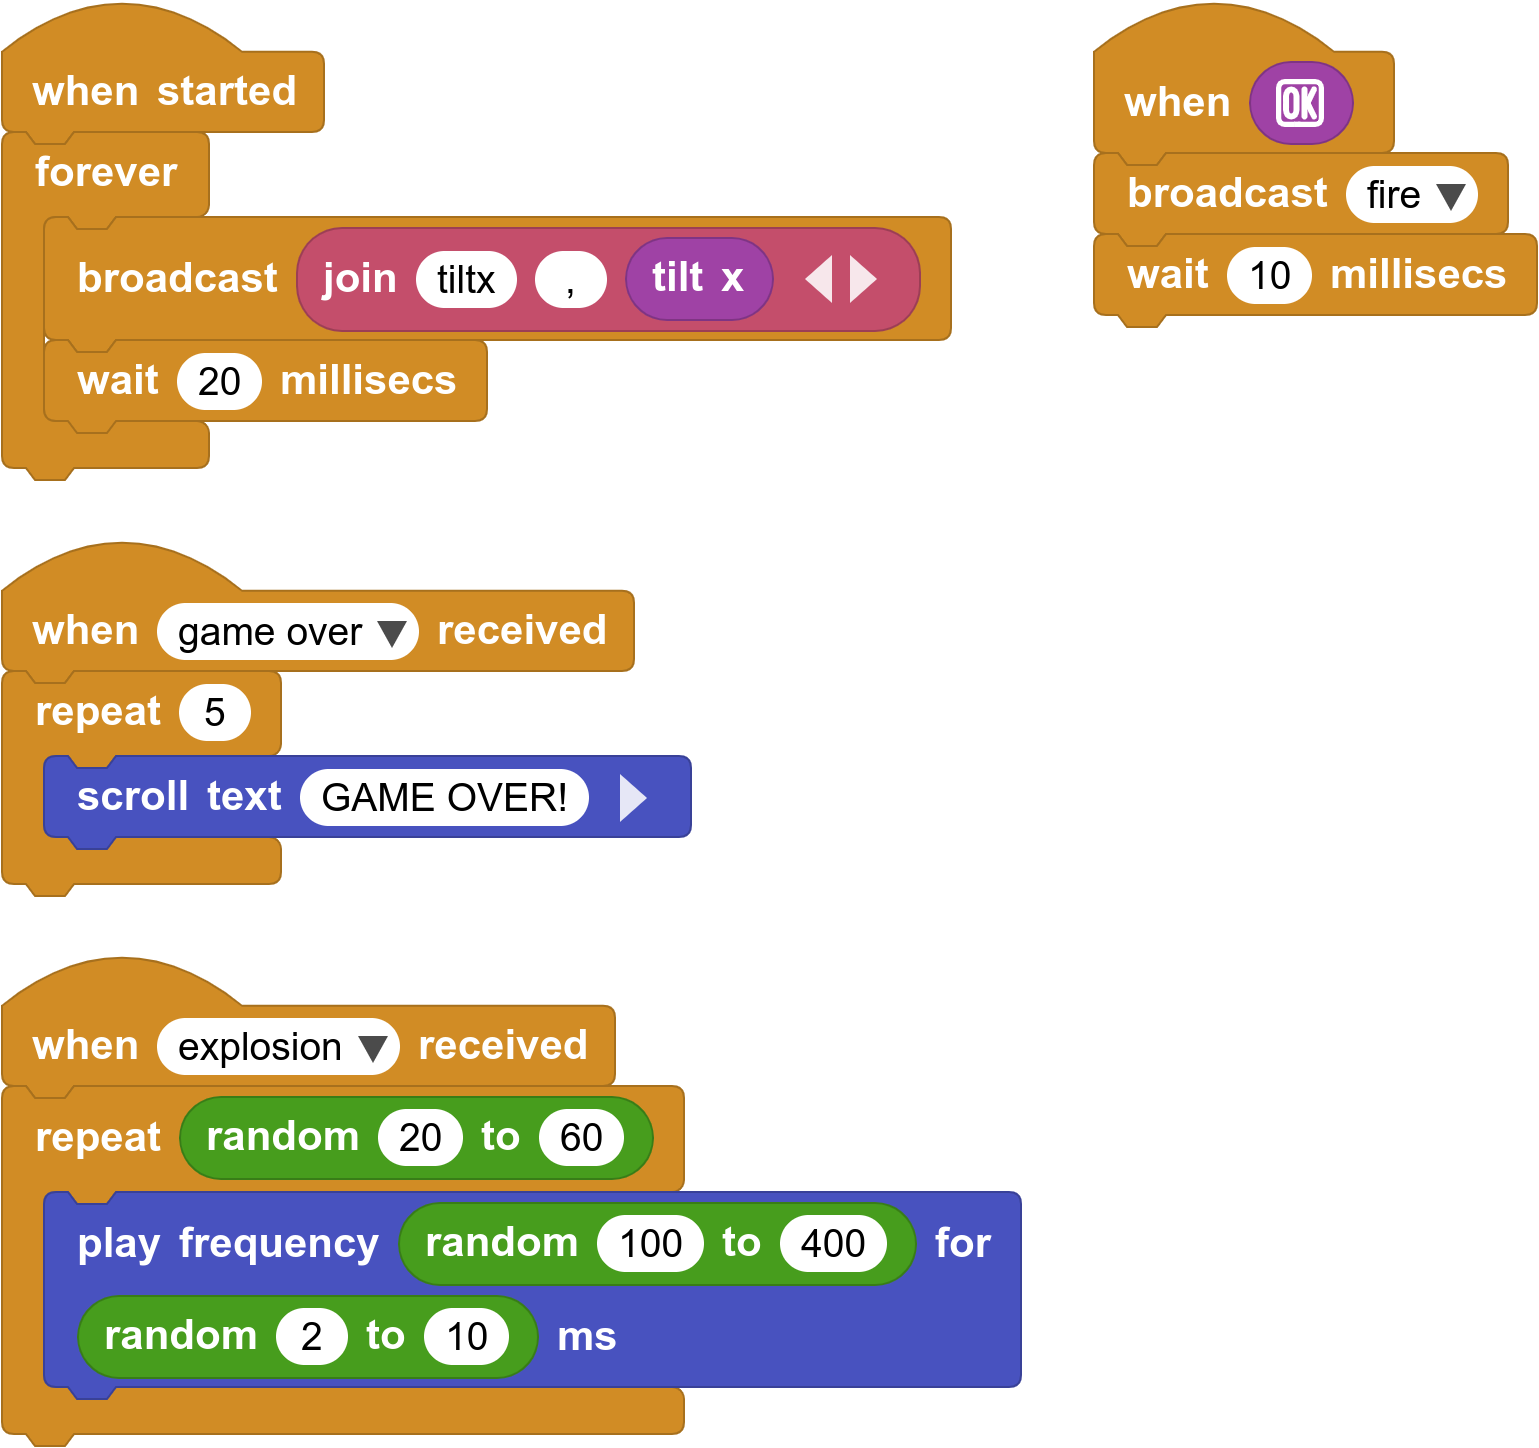
- To send a message to Snap! using the
send _block from the Control category. For example, we will use the OK button to fire.
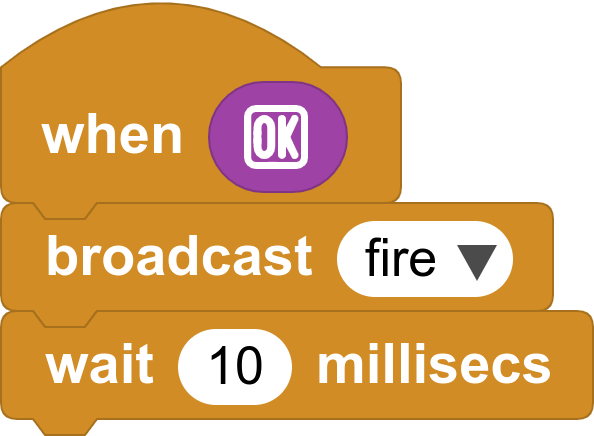
It is advisable to leave a small wait to avoid saturating the sending of messages.
To send a value, for example the X tilt of the board to control the starship, simply separate the name and the value with a comma.

- In the Snap! program, we only have to respond to these messages with the
When I receive _block, also in the Control category.

- We have adjusted the received value, since the X coordinate of the starship goes from -200 to 200 and the tilt takes values between -100 and 100.
From Snap! to MicroBlocks
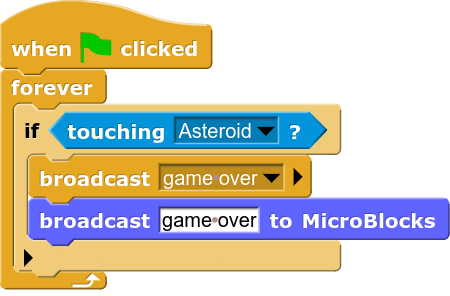
- To communicate Snap! with MicroBlocks, use the
broadcast _block. In our project, we can use it when an asteroid is destroyed, making a sound or vibration, and to indicate the end of the game on the board's screen.
Final Challenge: Complete the Game!
Solution to the final challenge
| ⬅️ Previous activity | Next activity ➡️ |
|---|
© von Citilab Edutec 2019-2025.
This work is licensed under a CC-BY-SA 4.0 license.